
Build a Chat Agent
Configure models, system instructions, knowledge bases, tool calls, interactive features, and workflow conversion in a Chat Agent.
A Chat Agent organizes system instructions, knowledge retrieval, tool calling, and multimodal inputs around a single core chat model through a form-based editor.
Use Cases and Prerequisites
- Use cases: Policy and product manual Q&A, standardized writing assistants, and lightweight assistants combining a single model with tools.
- Permissions: Application creation or editing permission in the active team, plus access to the selected models, knowledge bases, and tools.
- Model capabilities: Select a model with tool-calling support when attaching tools, and vision or audio support when enabling image or voice inputs.
Configuration Steps
1. Select the Model and Parameters
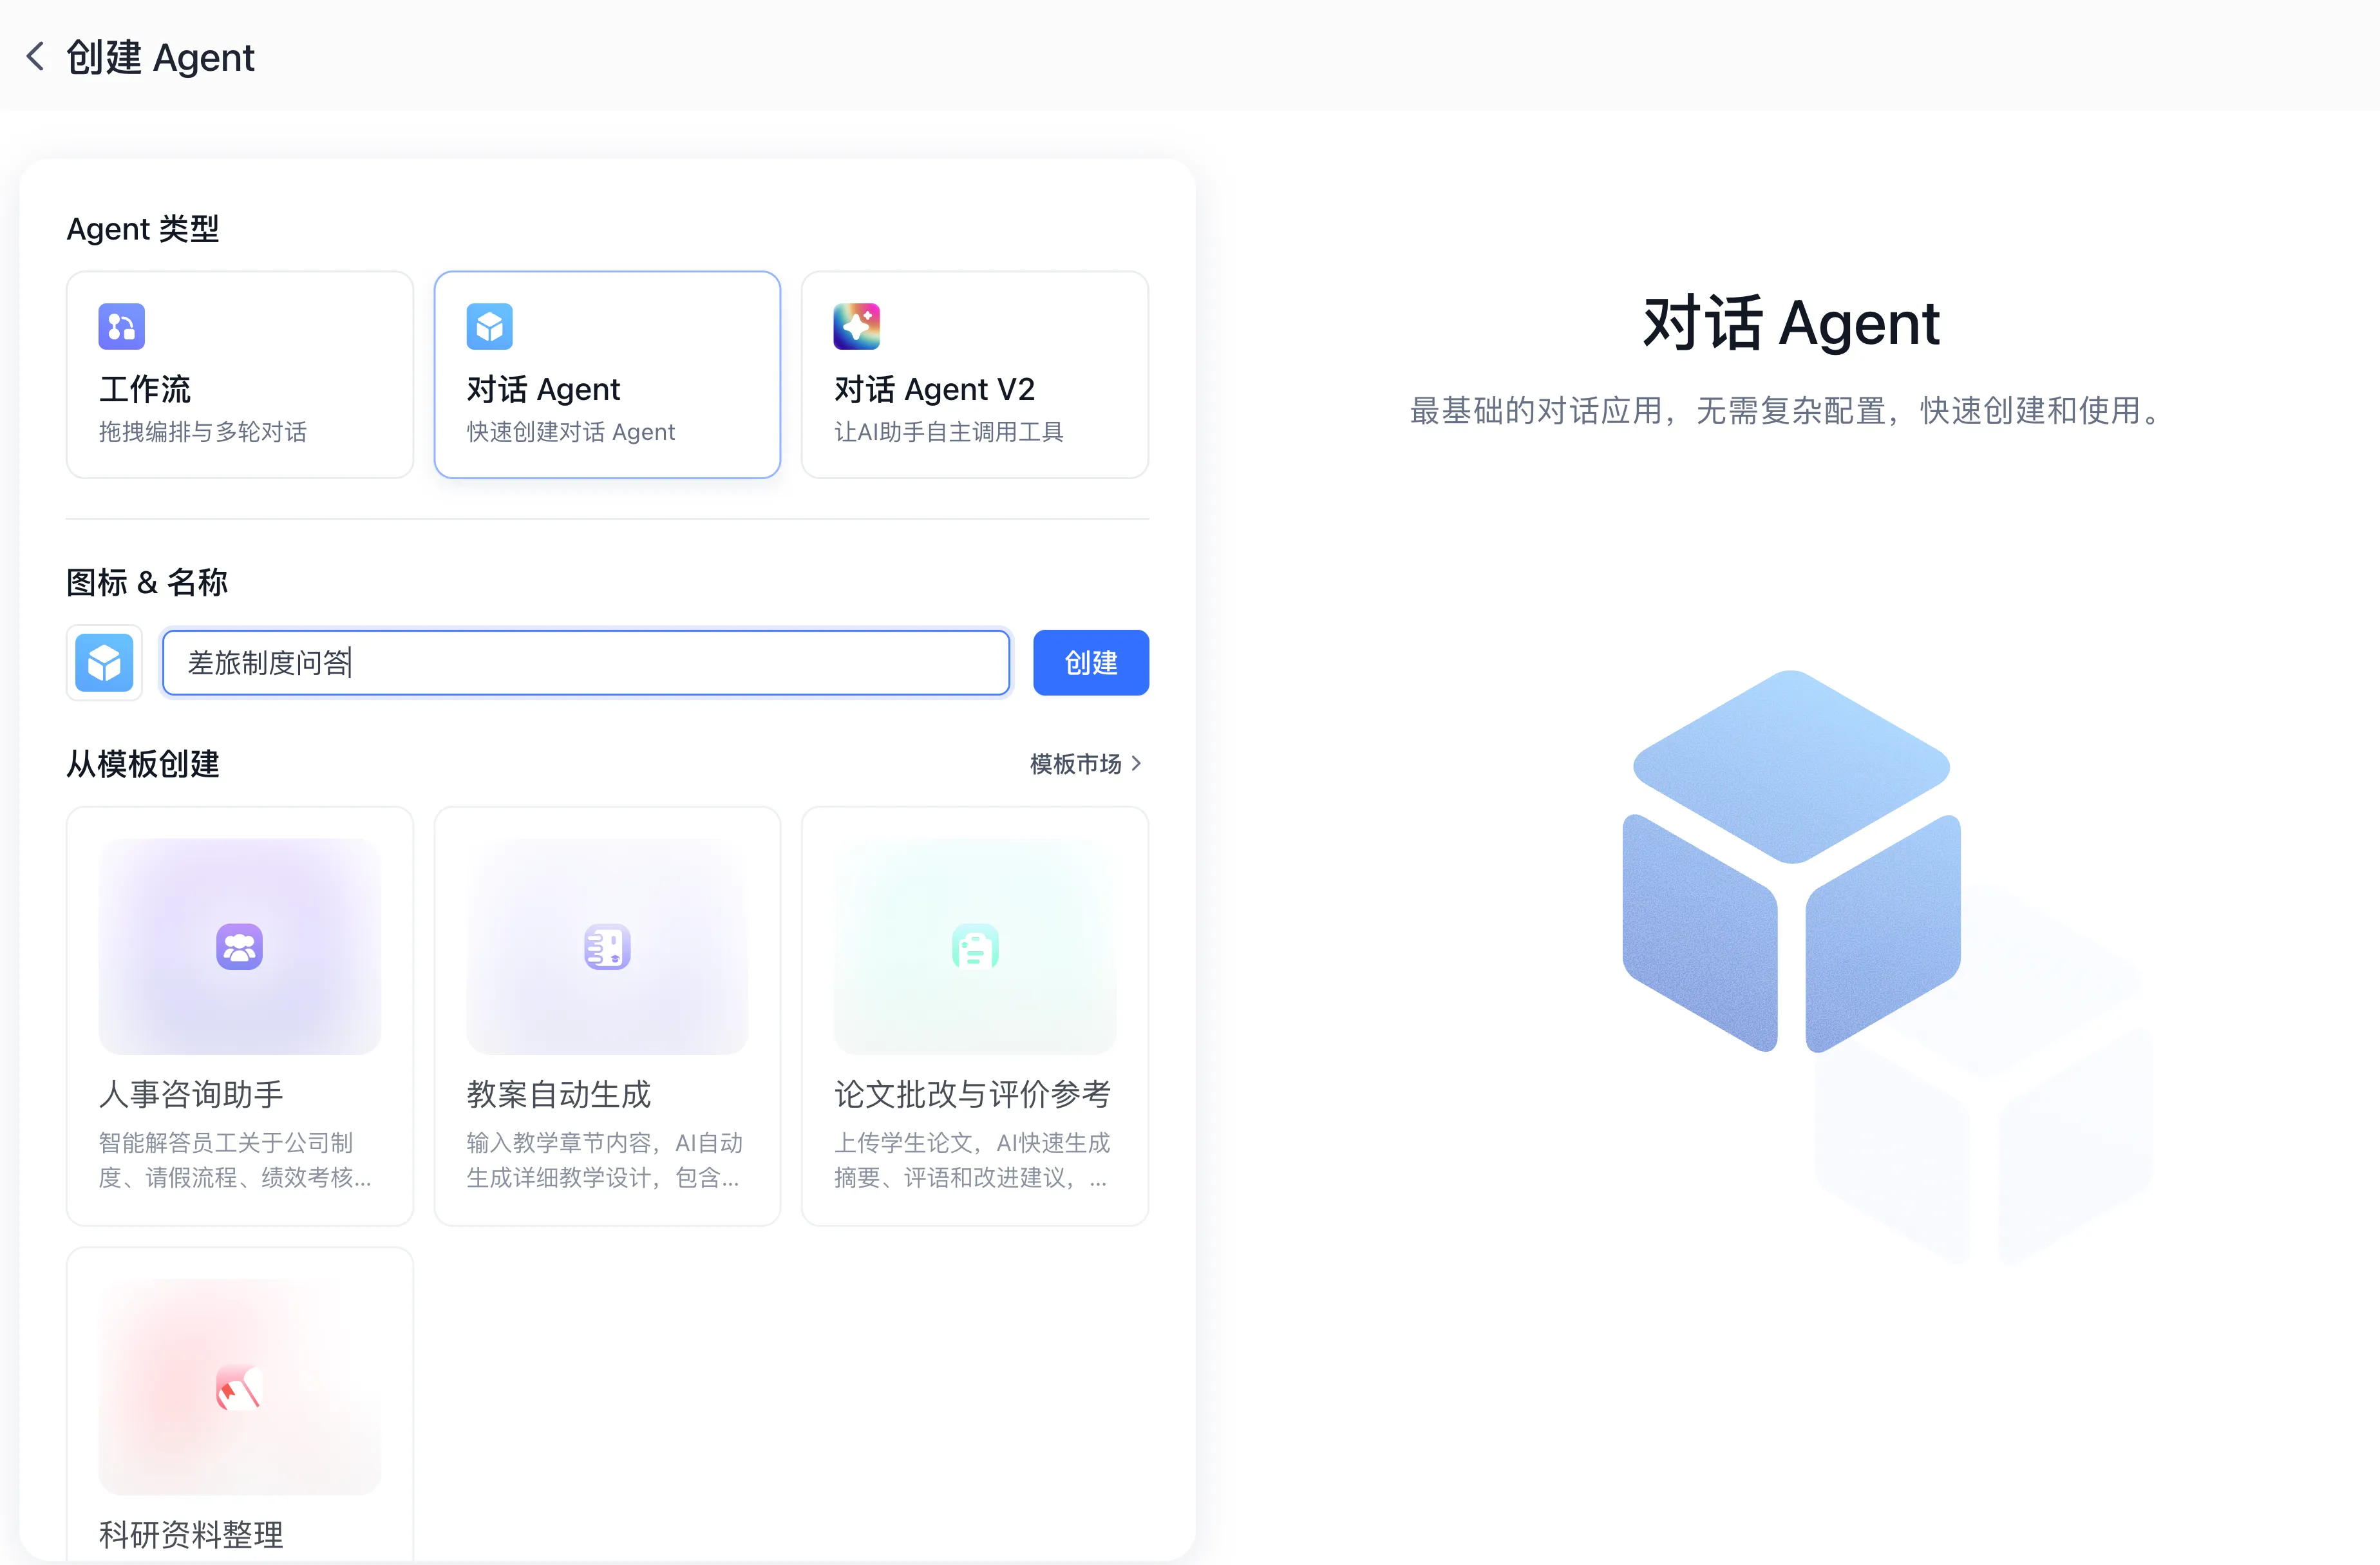
- Go to Studio → Agents, click the first New card in the list (when the list is empty, click Create your first Agent in the center of the page), select Chat Agent, enter a name, and click Create to the right of the name field.
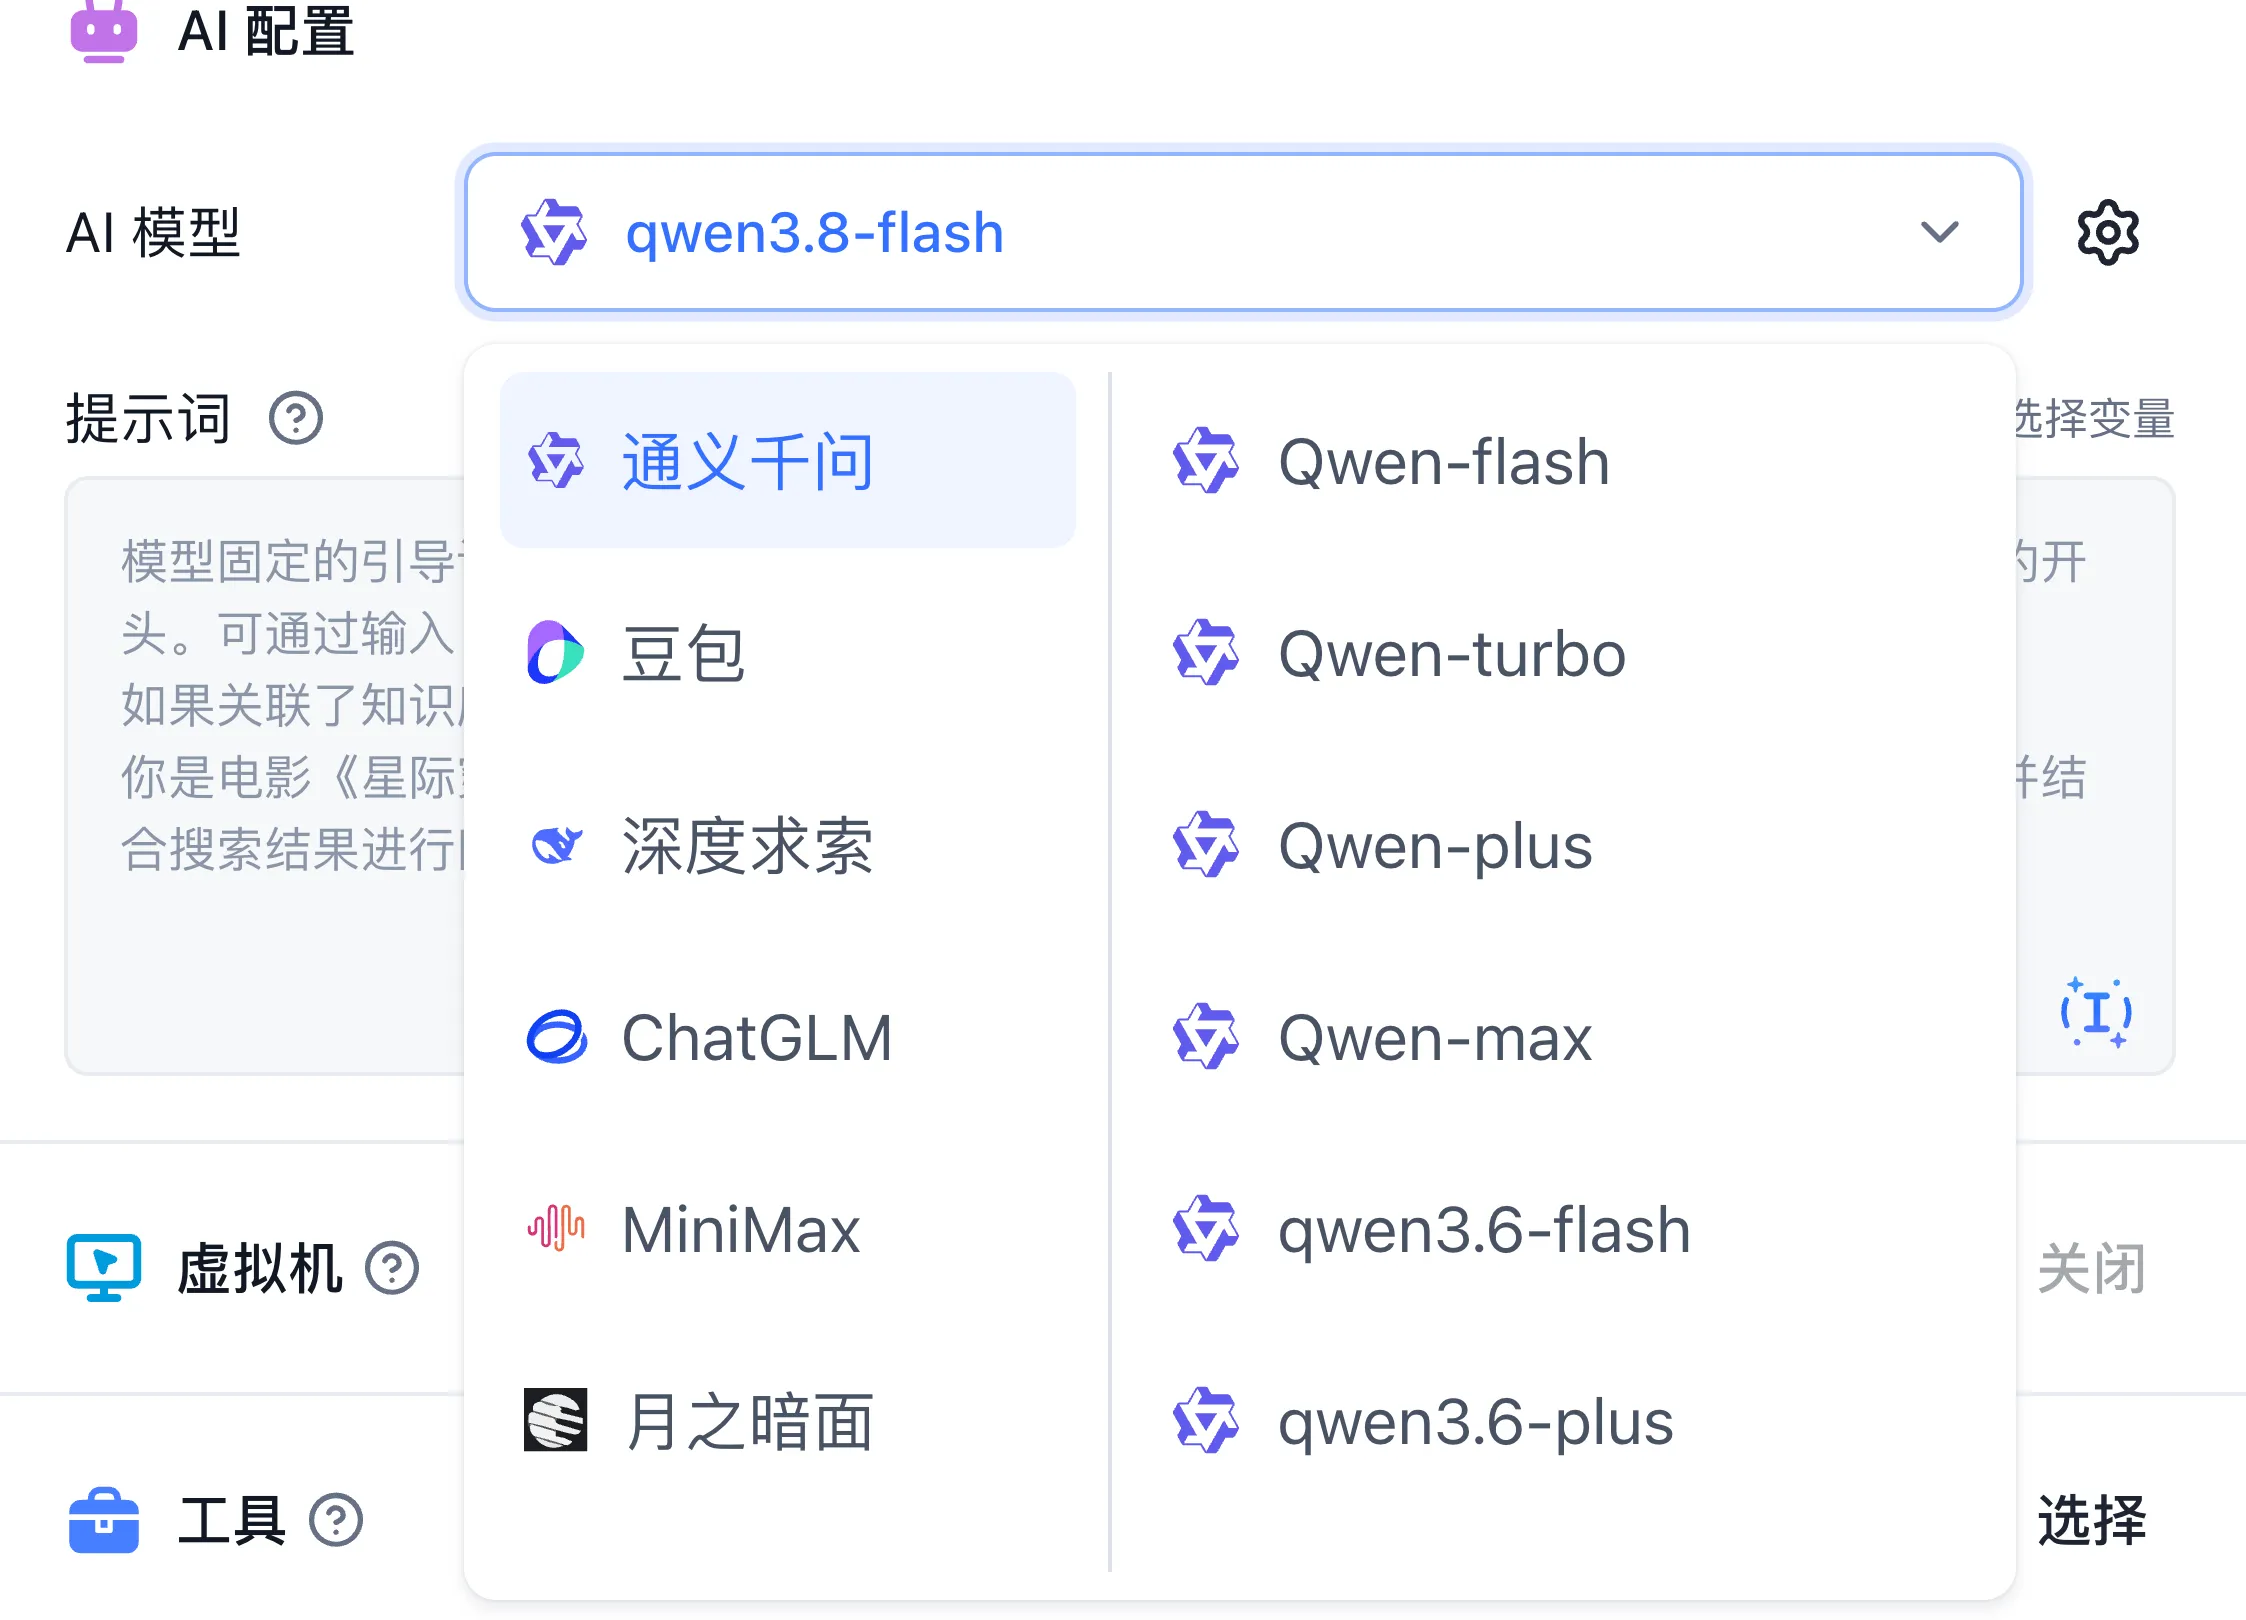
- Click the model selector in the left AI Settings panel and choose an available language model.
- Open the parameter dialog next to the model to configure temperature, max response tokens, chat history turns, output format (Text or JSON Schema), and reasoning mode. See AI Settings for parameter details.
2. Write System Instructions and Global Variables
- Define the assistant's role, grounding boundaries, and output structure in the Prompt field.
- Type
/in the prompt editor to open the variable selector and insert defined global variables (such as{{userName}}); click the AI prompt optimizer icon on the prompt field to generate or optimize the prompt. - Click New in the Global Variable section to add text, single-select, multi-select, or file variables when users need to supply context before starting a conversation.
3. Associate Datasets and Retrieval Settings
- In the Dataset section, click + Choose and select one or more team Datasets.
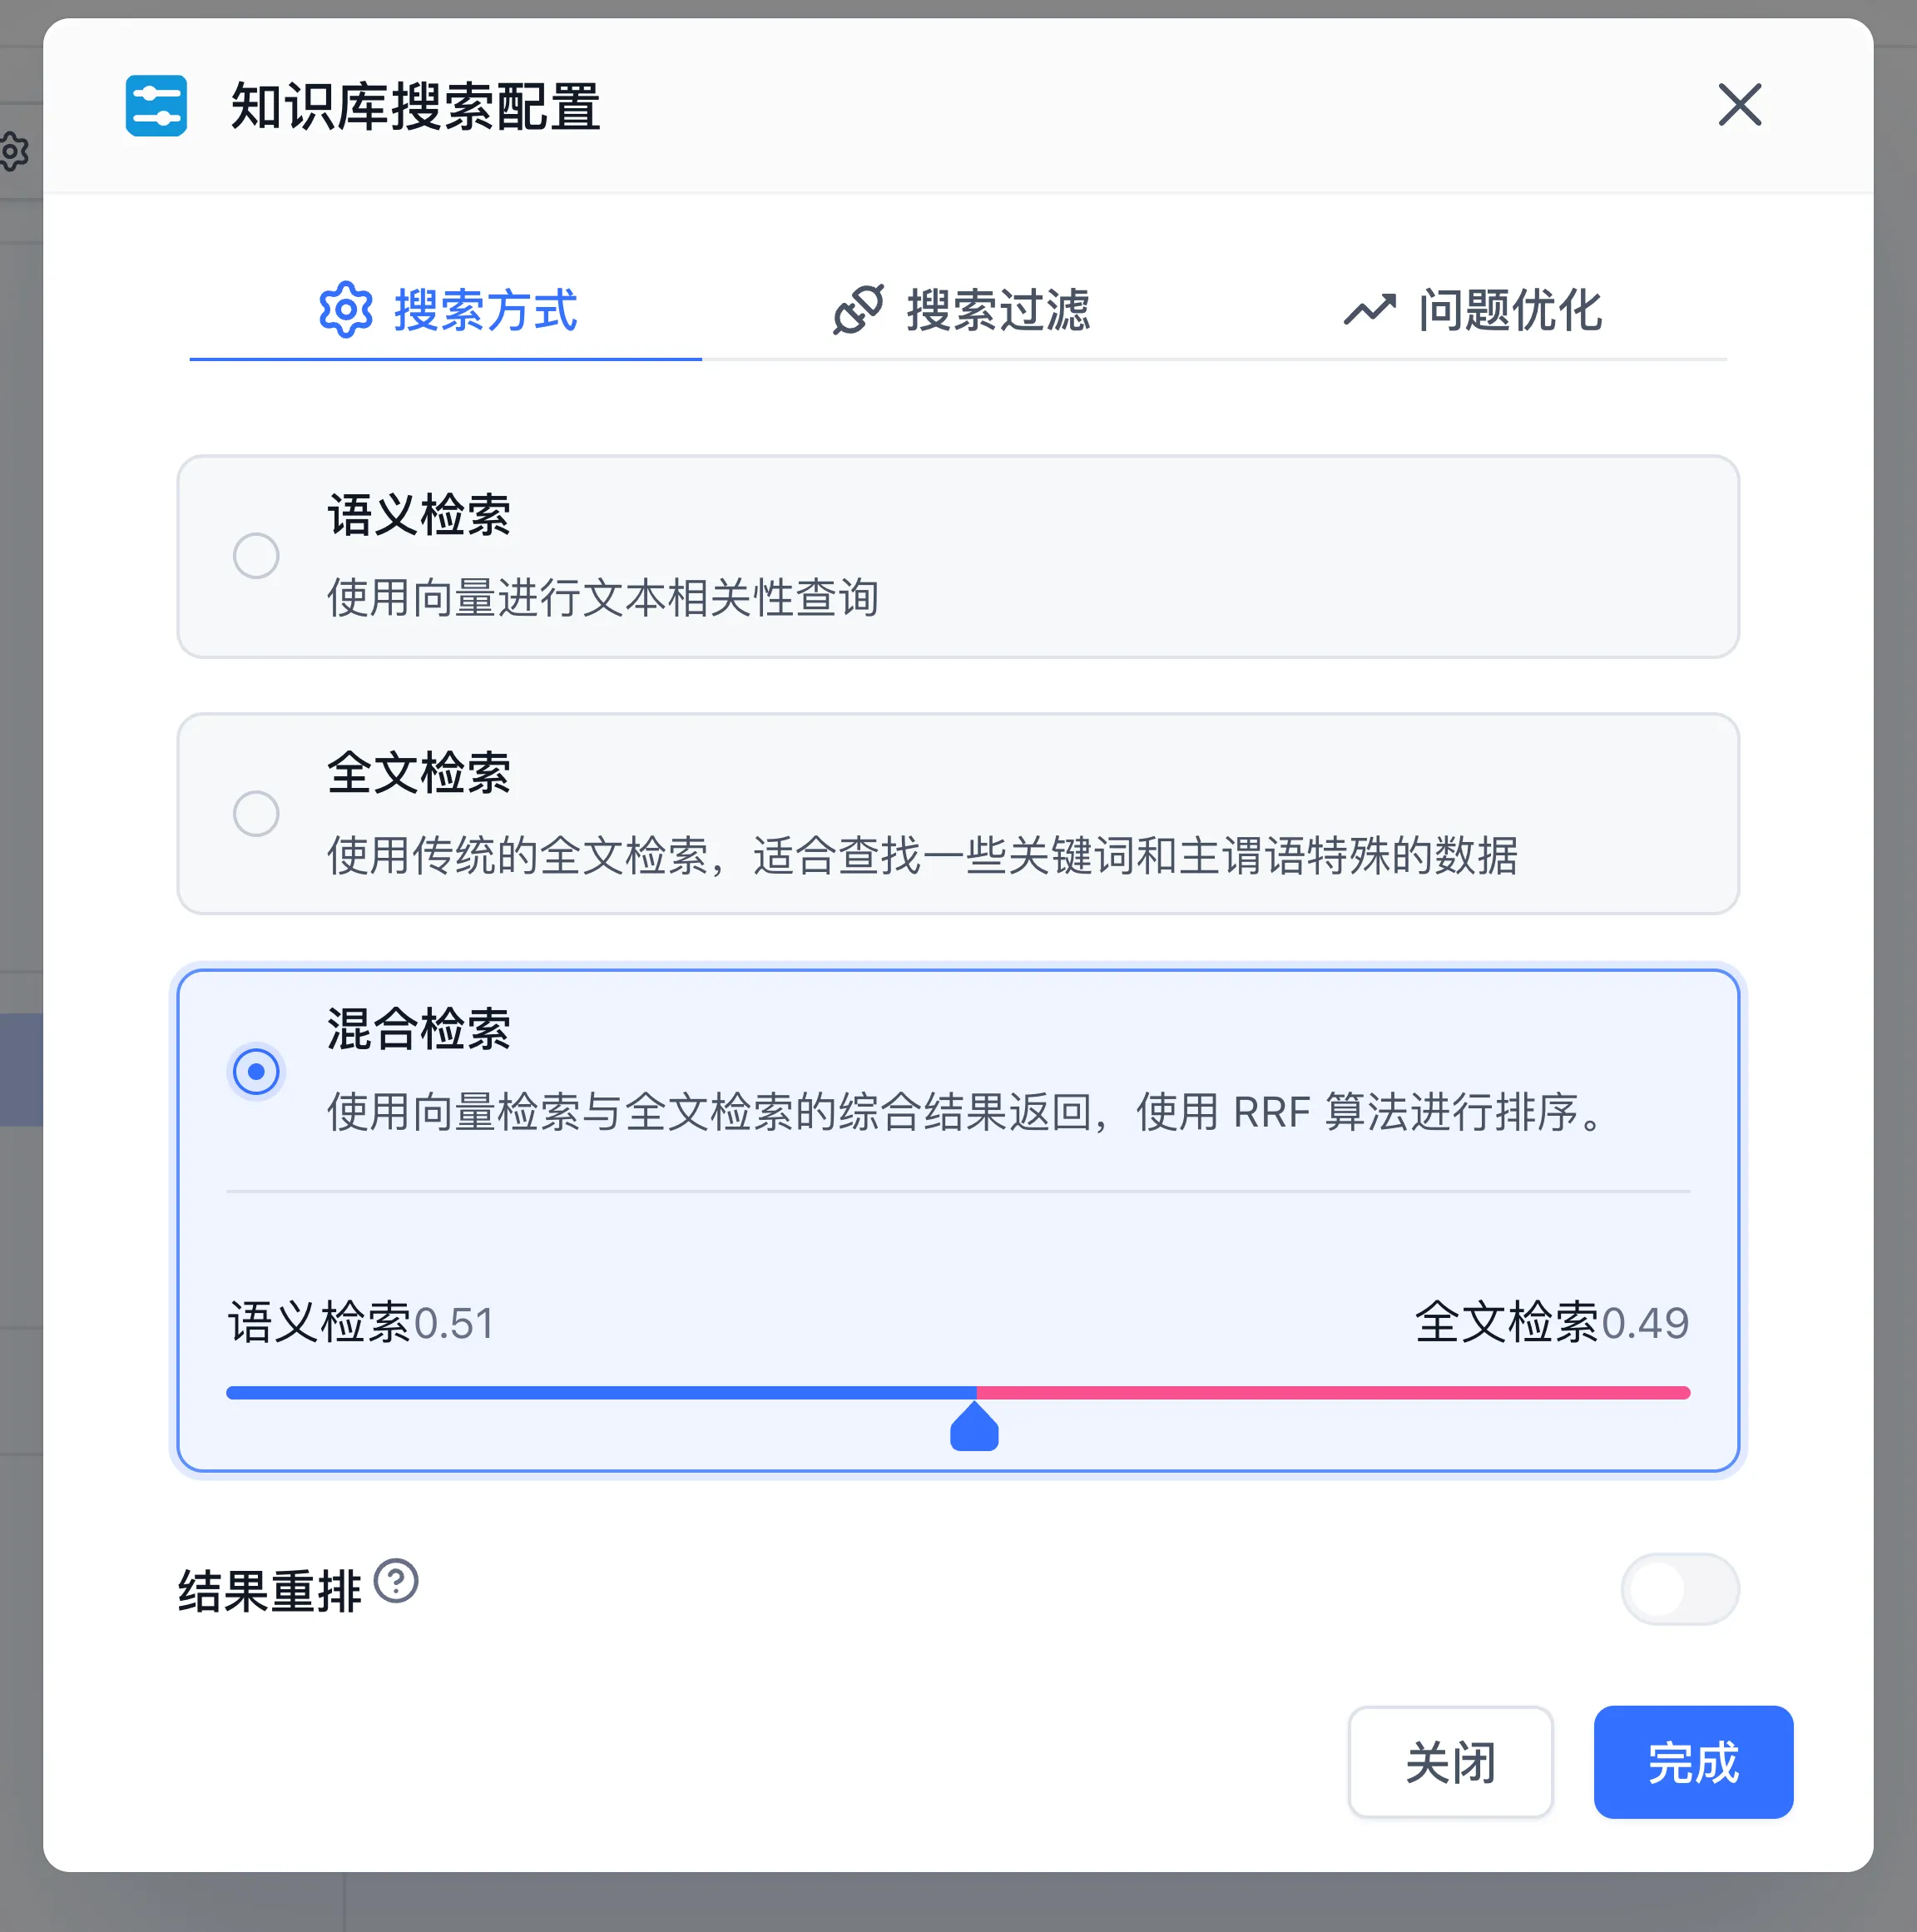
- Click Parameters to open the Dataset Search Configuration dialog. Use the Search Method / Search Filter / Query rewriting tabs to configure search mode (semantic, full-text, or hybrid), reranking, citation token budget, minimum relevance threshold, and query rewriting. The commercial edition adds a Tag filter tab for collection tag filters.
- See Connect a Knowledge Base to an Application for tuning steps.
4. Attach Tools
- In the Tool section, click + Choose (disabled until a model is selected) and pick tools from the System Tools / Tools / Agent tabs of the dialog. Workflow tools, HTTP tools, and MCP tools are under Tools.
- Supply required credentials or fixed parameters for the selected tools.
- State when each tool should be used in the system prompt so the model invokes tools automatically and synthesizes the returned data.
5. Configure Conversation Features
| Feature | Purpose | Detailed Guide |
|---|---|---|
| Conversation Opening | Display a greeting, quick starter questions, and rich text cards in new chats | Welcome Text |
| File Upload | Allow users to upload documents or images in the chat box | File Input |
| Voice Input / Voice Playback | Enable microphone speech-to-text (STT) and audio playback (TTS) | Voice Input |
| Guess What You Want to Ask / Input Guide | Generate follow-up suggestions or autocomplete prompts from a lexicon | Input Guide |
Debug, Publish, and Convert to Workflow
- Live debugging: Send test queries in the right Debug Preview pane, expand citation badges and run details, and verify retrieved chunks, tool arguments, and model outputs.
- Publish a release version: Once verified, click Save → Save and Publish in the top-right corner and enter a version name. Draft edits take effect on external channels after publication; see Published Versions and Publishing Channels.
- Convert to Workflow: When your scenario grows to require deterministic branching, loop processing, or human form input, click the ... (More) menu on the right side of the App name card in the upper-left corner and select Convert to Workflow. Leave the create-new-app checkbox selected (checked by default) to generate a new Workflow App copy, or clear the checkbox and confirm to convert the current App into a Workflow in place.
Troubleshooting
| Symptom | Check |
|---|---|
| Prompt or knowledge updates do not appear in shared links | Draft edits stay in the workspace until published; click Save → Save and Publish and start a fresh chat |
| Attached tools are not invoked | Confirm the selected model supports tool calling, tool descriptions are clear, and required secrets are configured |
| Knowledge base has content but answers lack citations | Run Search Test in the knowledge base and check relevance thresholds and collection tag filters |
Next: Explore autonomous planning and virtual machines in Chat Agent V2, or learn Visual Workflow Orchestration.
Last updated
Example 4: Agent V2 — Intelligent Data Analysis Agent
Analyze a reproducible sales sample, calculate product units and channel advertising ROI, and inspect downloadable artifacts.
Template Market, App Folders, and Batch Management
Create applications from templates and organize team applications with folders, batch actions, JSON import/export, and inherited permissions.