
Build Your First Workflow
Master visual canvas orchestration, node connections, input and output references, and end-to-end debugging.
This tutorial guides you through building a multi-node workflow with model invocation and output formatting on the visual canvas, demonstrating the core execution model of the FastGPT workflow engine.
Learning Goals and Prerequisites
By completing this tutorial, you will understand how execution edges and data references govern workflow runs, combining nodes into an operational pipeline: "Start → AI Chat (with optional Assigned Reply)".
Before starting, confirm the following prerequisites:
- Resource creation permissions in your current workspace team.
- An active chat model configured in the team.
- Basic familiarity with workspace navigation.
Step 1: Create a Blank Workflow
- Log in to FastGPT and click "Studio" in the left navigation bar. Click "Create your first Agent" in the center of the page (or the "New" card in the list if applications already exist) to open the "Create Agent" page.
- Select "Workflow" under "Agent Type", enter
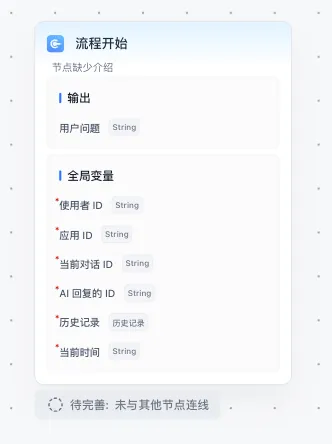
Summary Assistantas the name in the icon & name area, and click "Create". - The canvas initializes with only a "Start" node (the entry trigger for user messages).
Step 2: Add and Configure the AI Chat Node
- Add node: Click the black
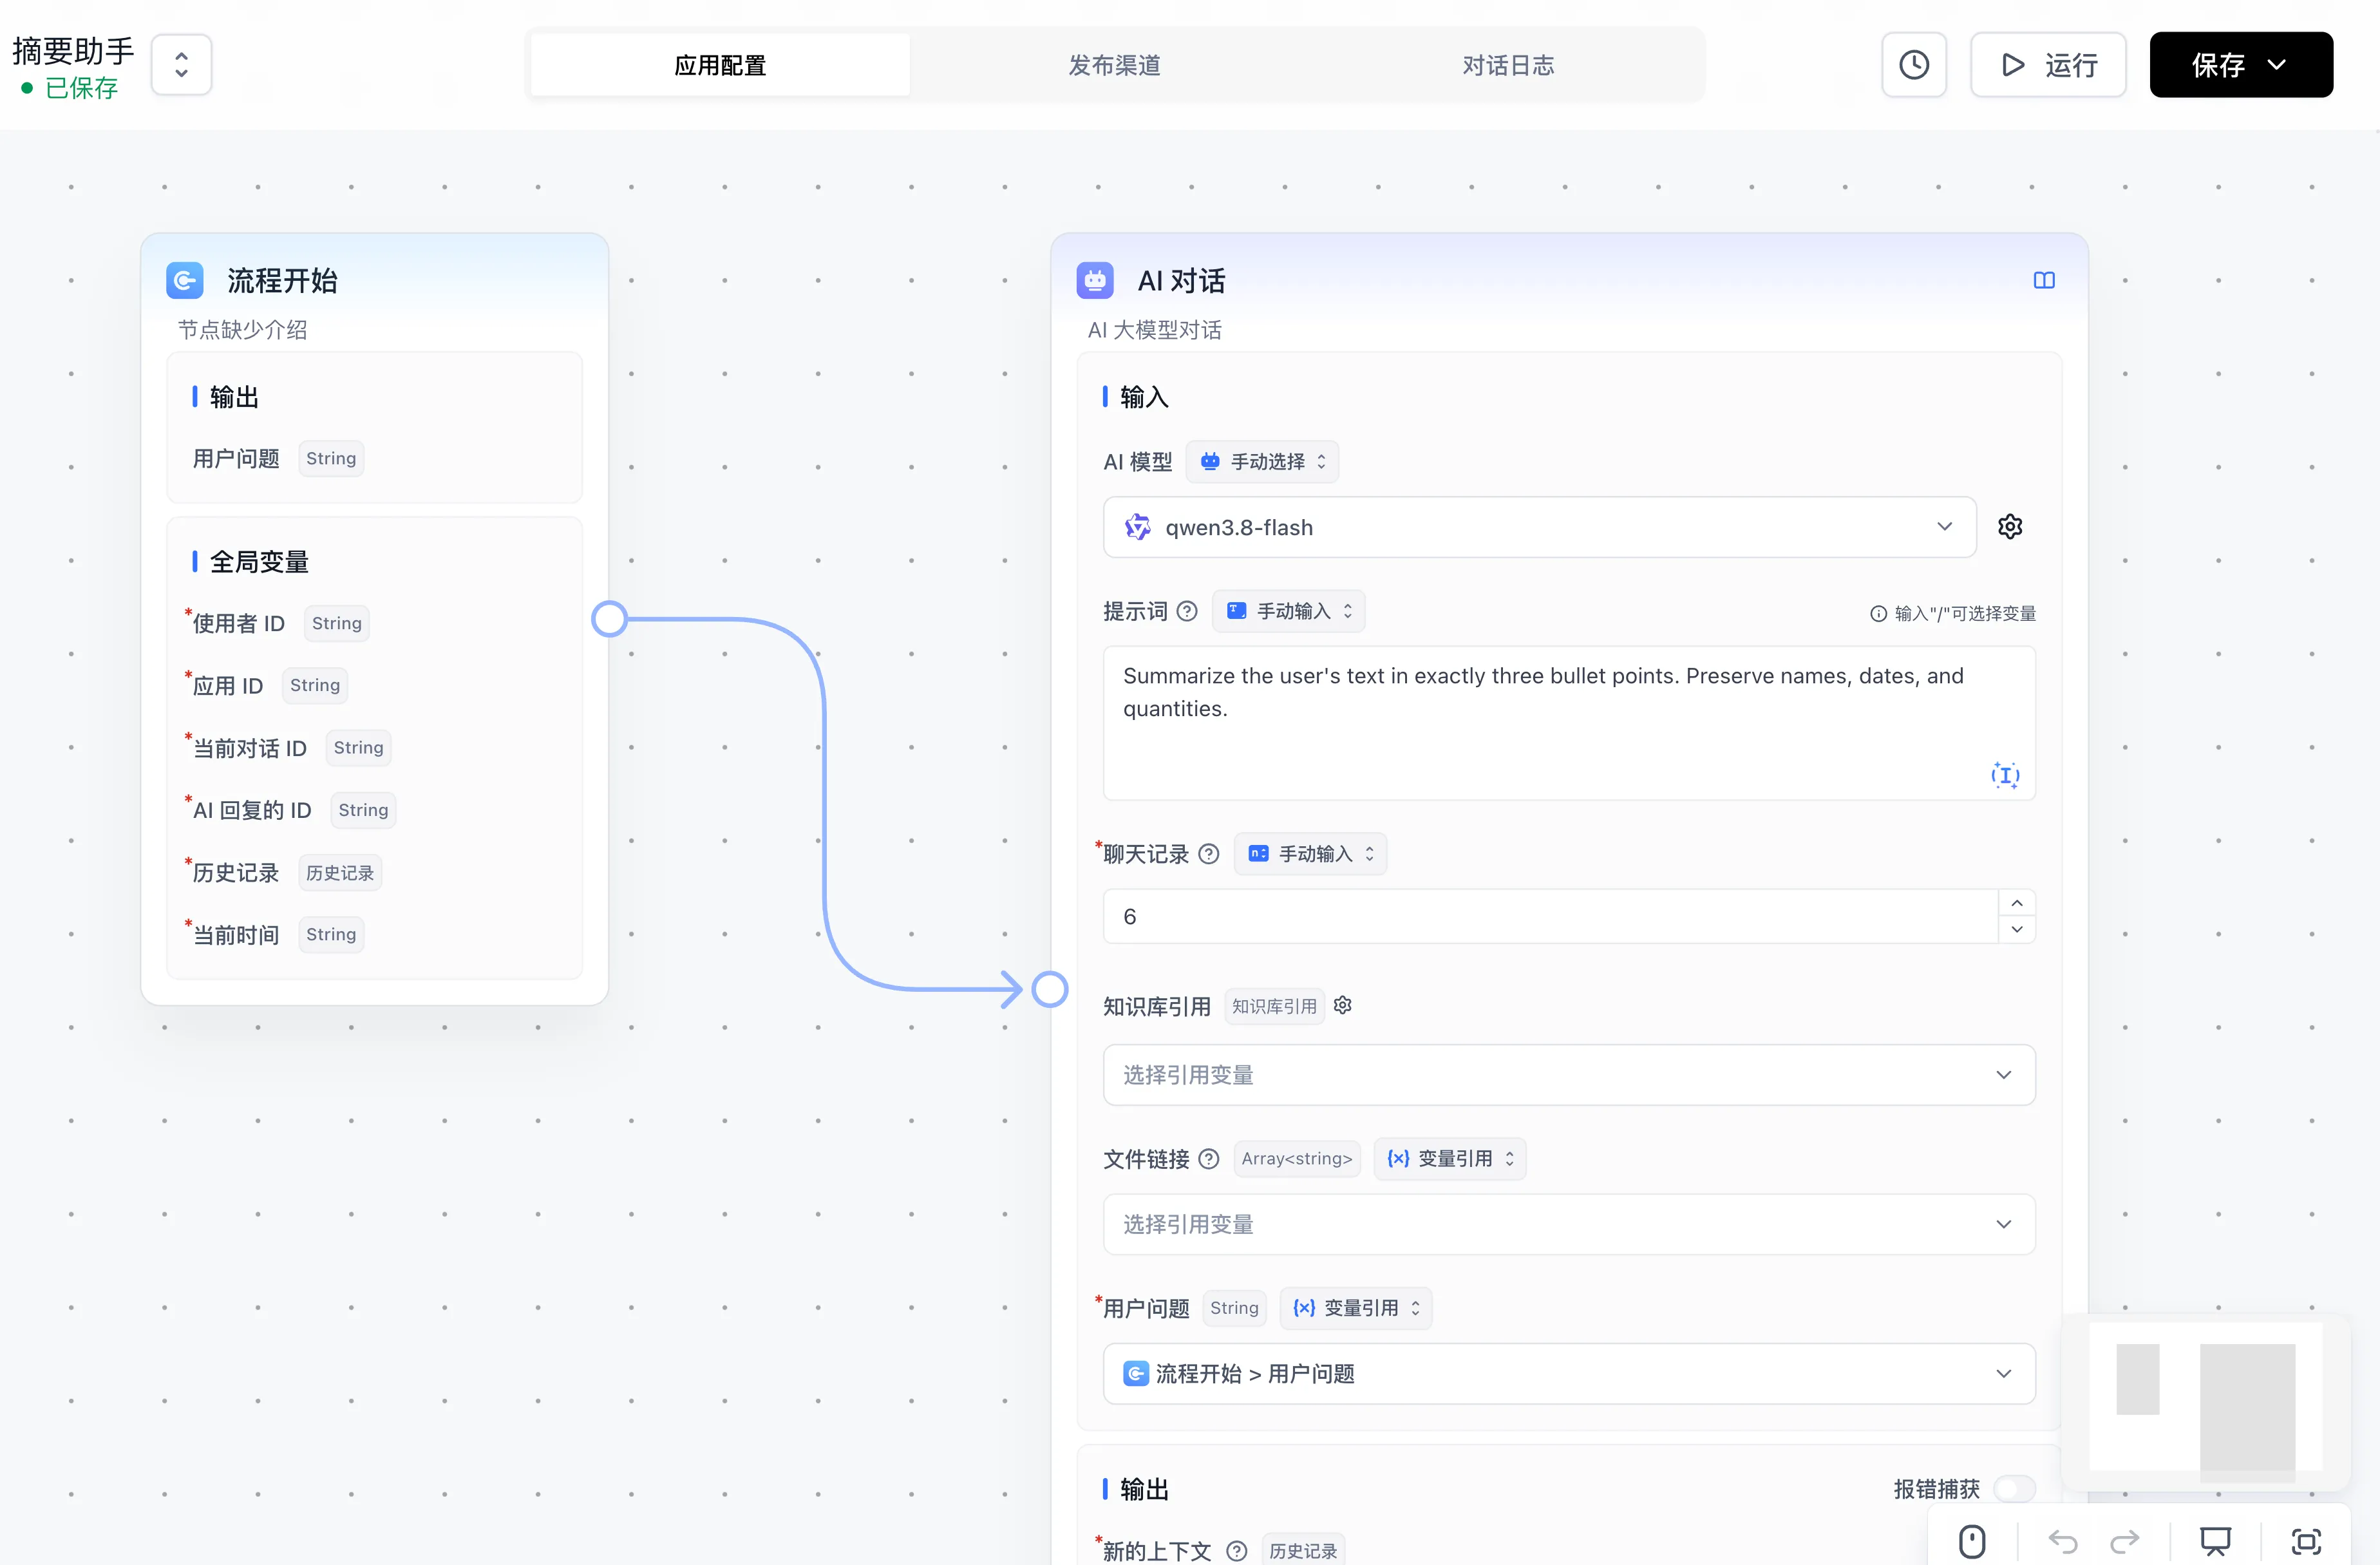
+(Add Node) button on the floating toolbar on the left side of the canvas to open the left node panel, then click or drag "AI Chat" from the "AI Capability" group under the "Basic" tab onto the canvas (you can also click the+on the blue right handle of the "Start" node and choose "AI Chat" in the popup panel). Right-clicking blank canvas space opens a context menu with three items: "Automatic alignment", "Add comment", and "Collapse all" ("Expand all" when all nodes are collapsed). - Connect execution edge: Ensure a line connects the right handle of the "Start" node to the left handle of the "AI Chat" node. Execution edges determine execution order.
- Configure node parameters (matching the screenshot below):
- AI Model: Keep
Manual Selectand pick an available chat model (such asqwen3.8-flash). - Prompt: Keep
Manual Inputand enterSummarize the user's text in exactly three bullet points. Preserve names, dates, and quantities.. - User question: Keep
{x} Variable Citationselected on the right, click the variable dropdown below, and bind it toStart > User Question.
- AI Model: Keep
Step 3: Configure Response Output Mode
Workflows support two ways to return chat responses to the user:
- Option 1: Direct output from the "AI Chat" node (default, shown in screenshots) By default, the "AI Chat" node streams its generated reply directly to the chat window. Click the gear icon to the right of the "AI Model" dropdown on the "AI Chat" node to open the "AI Settings" dialog; the "Hide AI output" toggle sits at the end of the "Basic settings" section. Keeping it turned off sends the summary directly to the user.
- Option 2: Custom formatting with an "Assigned Reply" node (optional)
To wrap the model output with custom prefix or suffix text:
- Click the black
+(Add Node) button on the left canvas toolbar, and under the "Basic" tab ("tool" group), add an "Assigned Reply" node. - Connect the right handle of the "AI Chat" node to the left handle of the "Assigned Reply" node.
- Click the gear icon next to the "AI Model" selector on the "AI Chat" node and turn on "Hide AI output" at the end of the "Basic settings" section so the response is only sent once.
- Configure the "Response Content" field on the "Assigned Reply" node (its mode selector on the right defaults to
Manual Input):- Output model reply only: Switch the mode dropdown next to "Response Content" from
Manual Inputto{x} Variable Citation, then selectAI Chat > AI Response Content. - Combine fixed text with model reply: Keep
Manual Input, type your introductory text (for example,Here is your 3-point summary:), press/to open the variable picker, and selectAI Chat > AI Response Content.
- Output model reply only: Switch the mode dropdown next to "Response Content" from
- Click the black
Step 4: Click "Run" for End-to-End Debugging
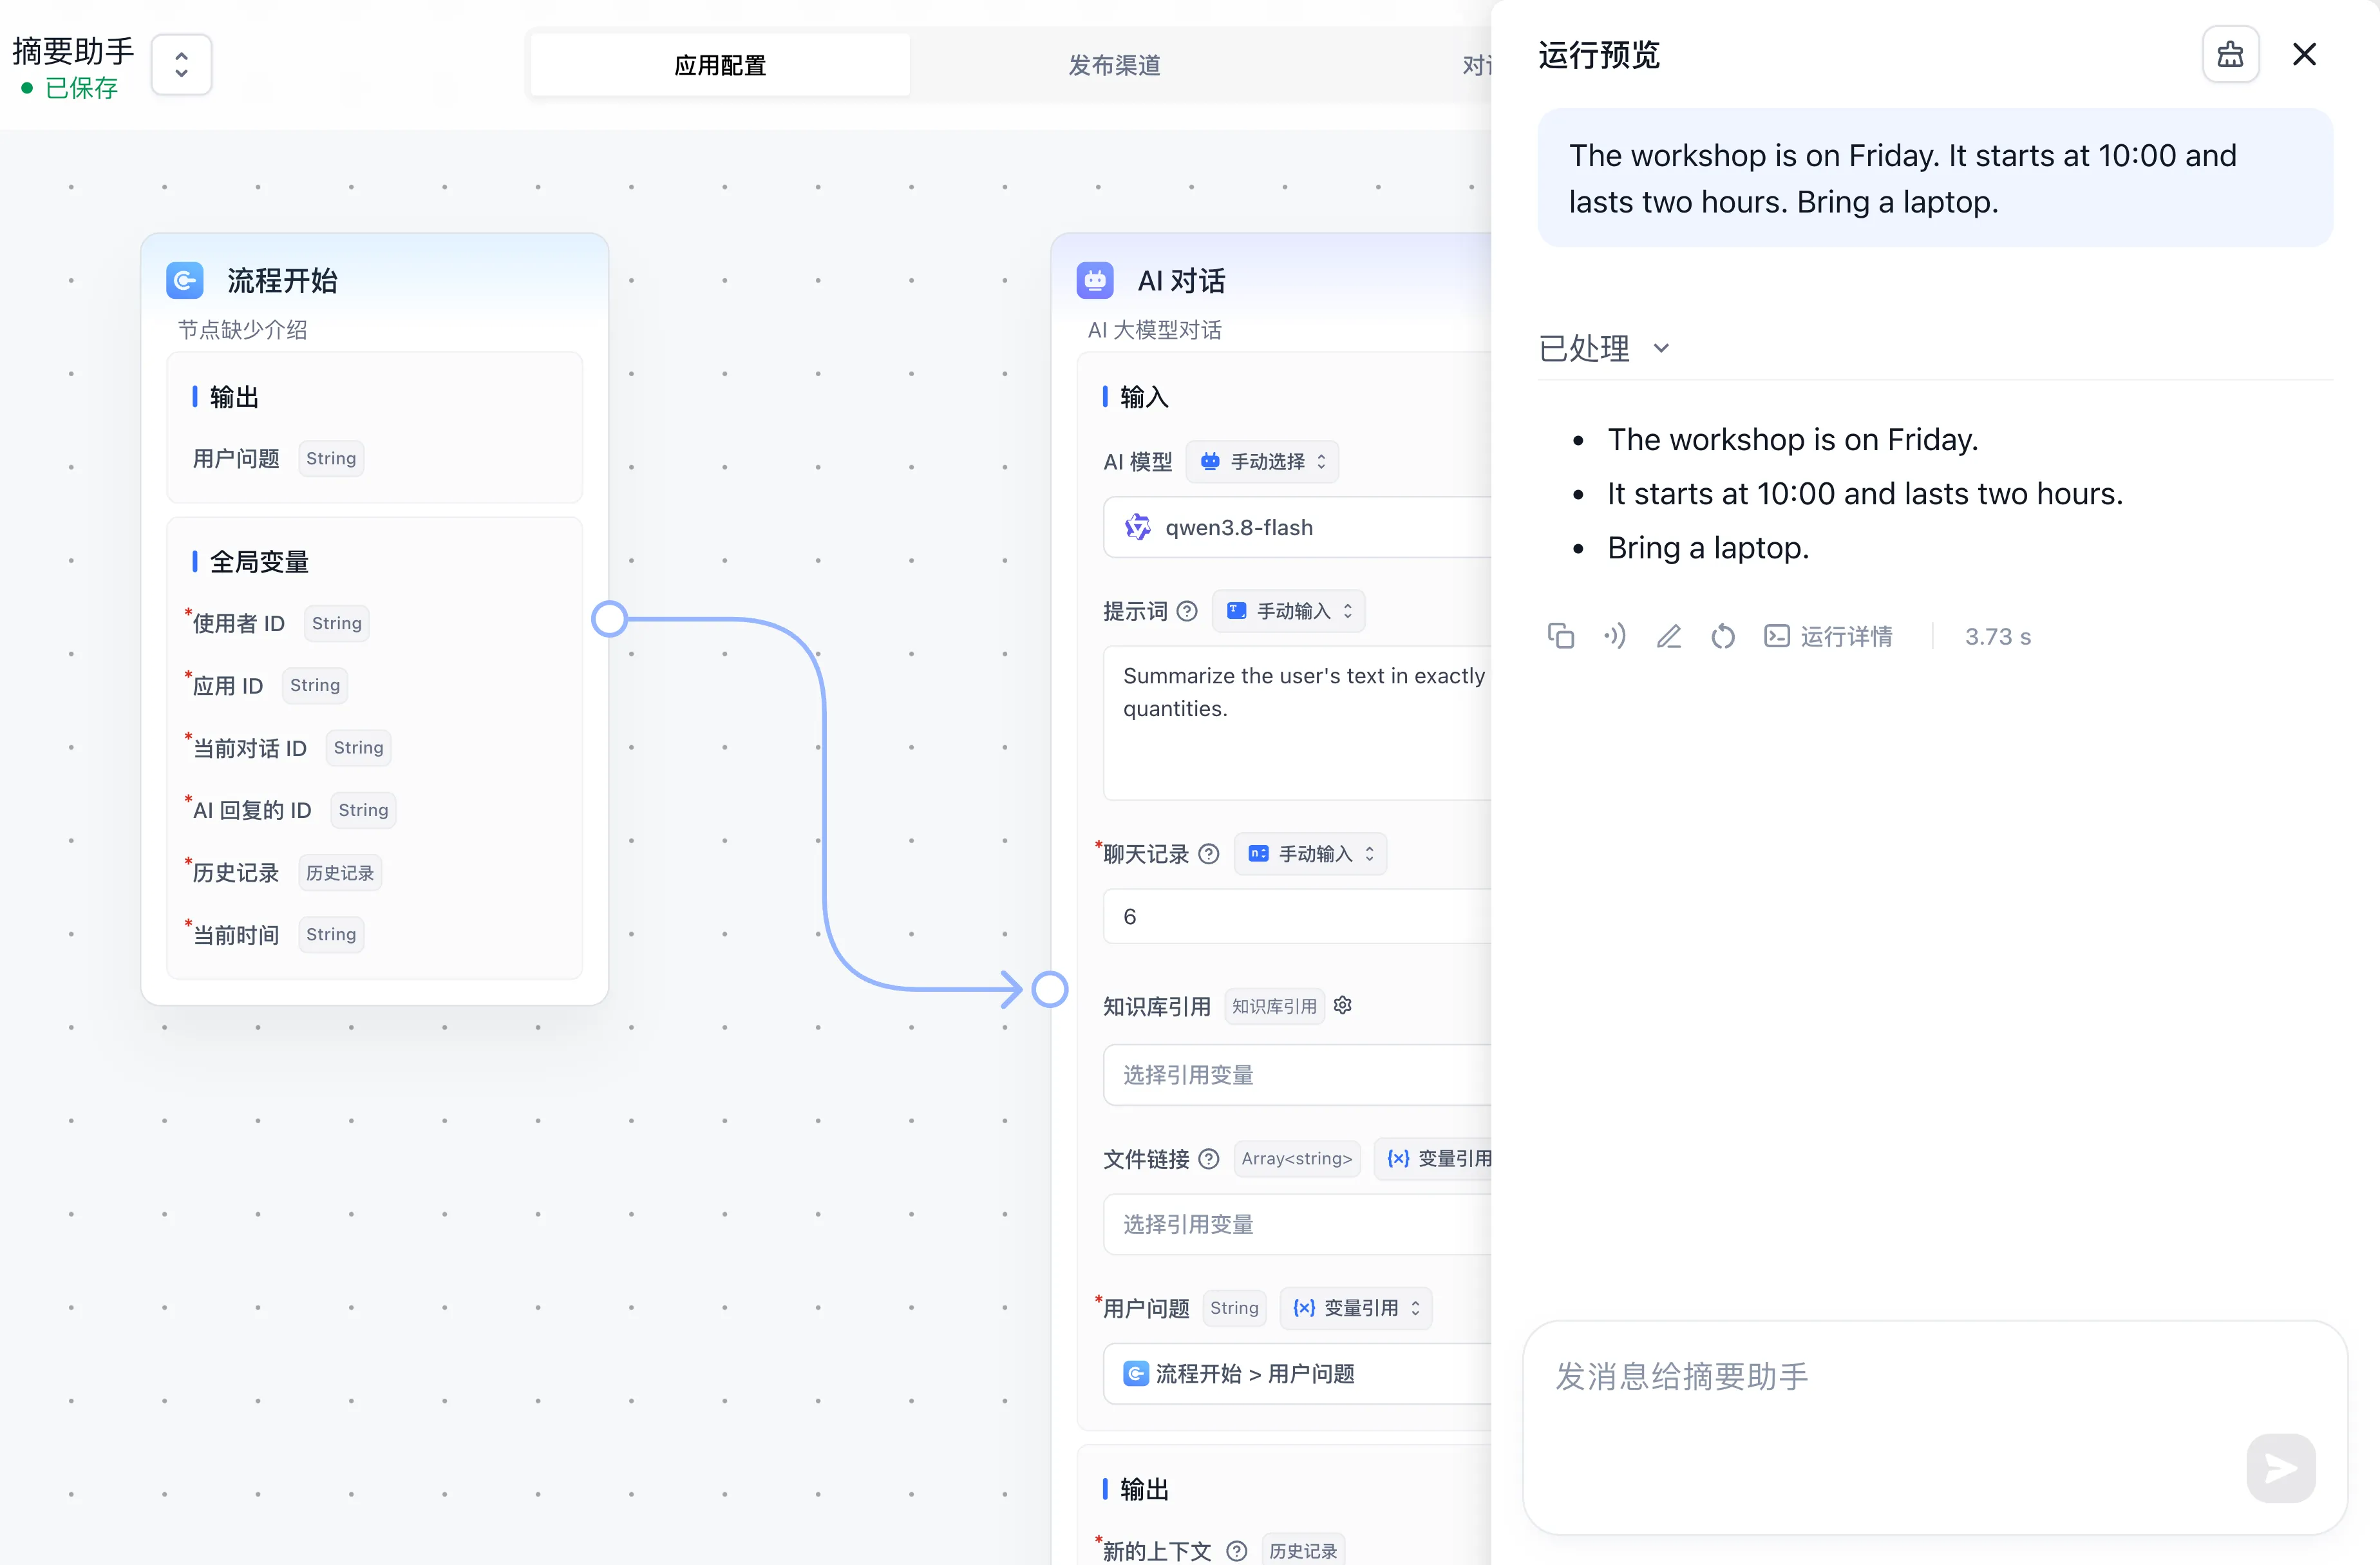
- Click the "▷ Run" button in the upper right corner of the canvas to open the "Run Preview" drawer on the right.
- Enter the following test text in the "Run Preview" input box:
The workshop is on Friday. It starts at 10:00 and lasts two hours. Bring a laptop.- Submit the message and inspect the result:
- The "Run Preview" drawer returns three concise bullet points preserving
Friday,10:00,two hours, andlaptop. - Click "Run Details" below the response to inspect the input parameters, output values, status, and duration for each node.
- The "Run Preview" drawer returns three concise bullet points preserving
Step 5: Save and Publish the Active Version
- After confirming the output quality, click the "Save" button in the upper right corner and select "Save and Publish" from the dropdown.
- Enter a version name (such as
Summary Assistant v1) in the dialog and click "Confirm". - The newly published configuration takes over public channel requests immediately, while draft modifications remain isolated in your workspace.
Orchestration Troubleshooting
| Common Issue | Resolution Steps |
|---|---|
| Node remains pending and never runs | Inspect upstream execution edges leading to the node; confirm all predecessor dependencies triggered |
| Downstream model receives empty input | Check variable reference bindings; ensure the input correctly maps to the upstream output field |
| Canvas generates no chat response | Verify that your workflow contains output-enabled nodes (such as an AI Chat node with "Hide AI output" turned off, or an Assigned Reply node) |
| Variable updates fail to appear downstream | Ensure the variable write node executes earlier in time than the downstream reading node |
Next Steps
- Conditional routing: Split execution paths based on logic in Condition Switch Node.
- Intent classification: Route messages by semantic category in Question Classifier Node.
- Batch processing: Handle collections efficiently in Loop Execution Node and Parallel Execution Node.
Last updated
Create Your First Agent Task
Configure Chat Agent V2 to master system prompt authoring, tool and knowledge base attachment, and execution trace inspection.
How-to Guide: Build an Accurate Knowledge-Base Q&A Application
Master knowledge ingestion chunking, multi-route retrieval and reranking, prompt constraints, and citation transparency.