
Create Your First Agent Task
Configure Chat Agent V2 to master system prompt authoring, tool and knowledge base attachment, and execution trace inspection.
This tutorial guides you through building a Chat Agent V2 capable of autonomous planning and tool invocation, completing an end-to-end task from knowledge retrieval to structured checklist output.
Learning Goals and Prerequisites
After finishing this tutorial, you will understand the core execution model of Chat Agent V2, learn how to attach tools and knowledge bases, and analyze model reasoning steps through execution traces.
Before starting, verify the following prerequisites:
- Resource creation permissions and knowledge base read permissions in your active team.
- An available chat model (default preset models in FastGPT Cloud already support tool calling; in self-hosted environments, select the model in the "AI Settings" dialog and confirm that the "Tool call" column shows "Support").
- Completion of the Quick Start Tutorial, ensuring the
Corporate Travel Policyknowledge base exists in your team.
Step 1: Create a Chat Agent V2
- Log in to FastGPT and click "Studio" in the left navigation bar.
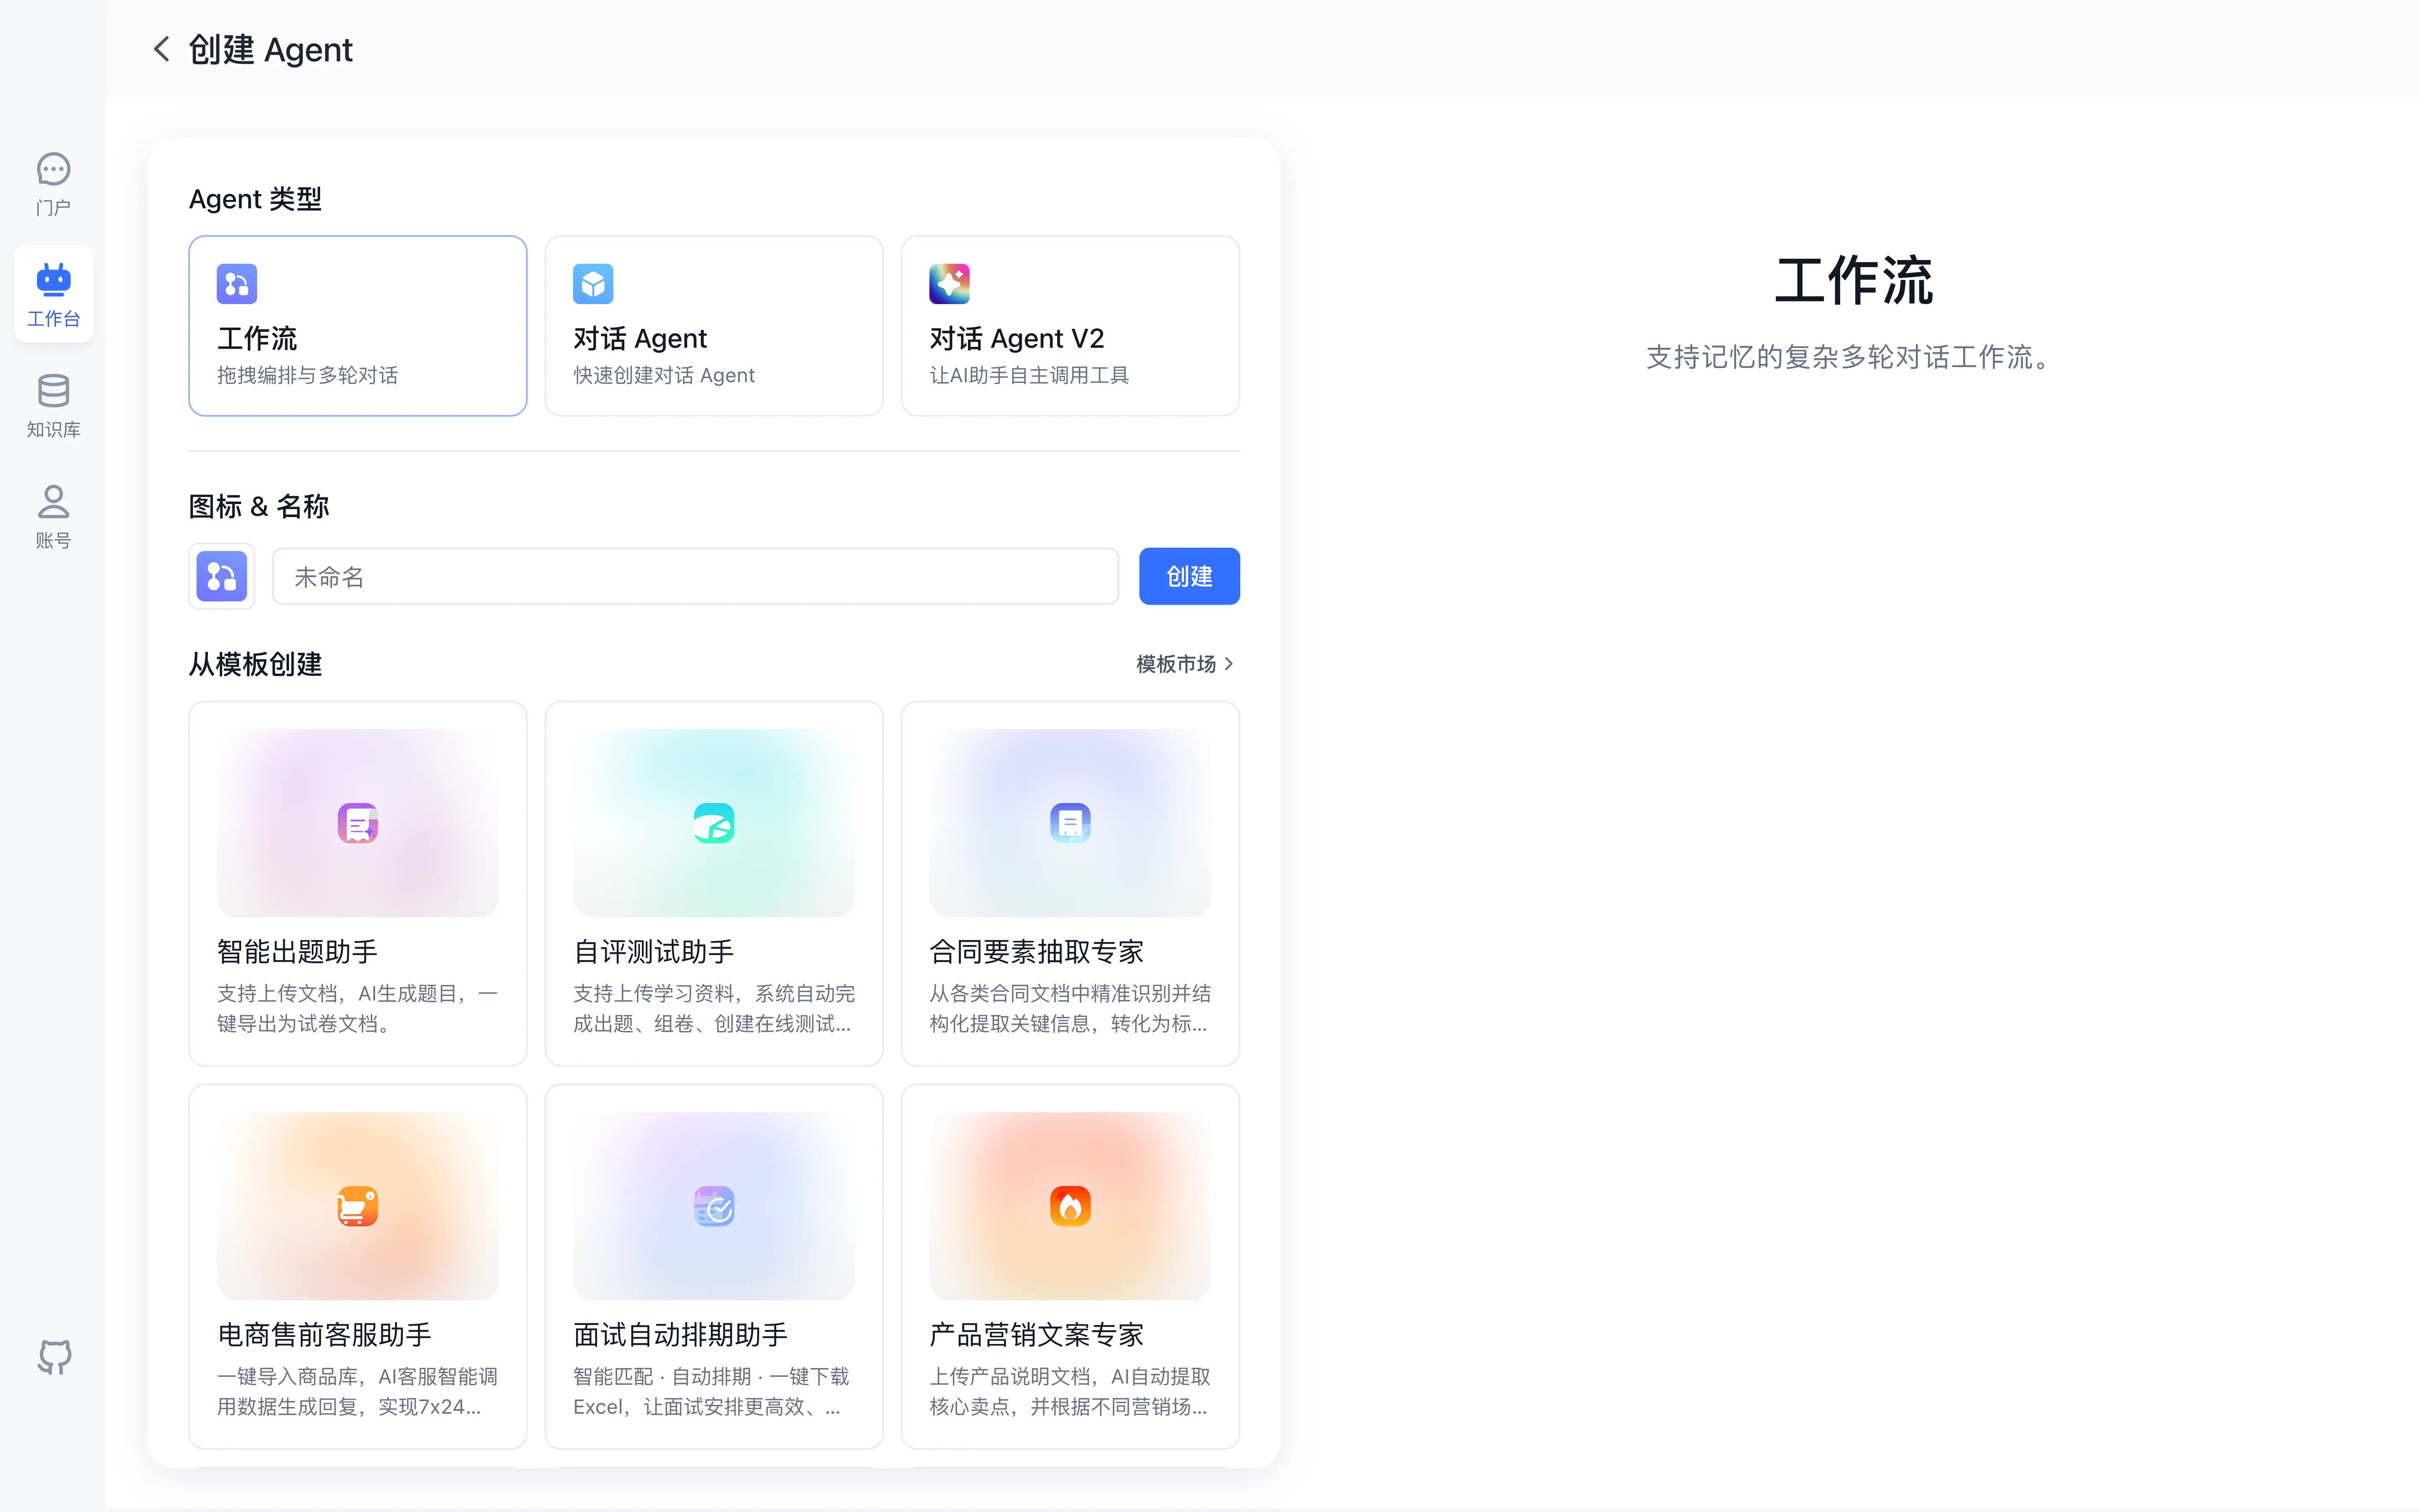
- Click "Create your first Agent" in the center of the page (or the "New" card in the list if applications already exist) to open the "Create Agent" page.
- Select "Chat Agent V2" under "Agent Type", enter
Expense Check Assistantas the name in the icon & name area, and click "Create". - In the "App settings" view, select an available model under "AI Settings → Model" (such as
qwen3.8-flashshown in the screenshot) and confirm in the "AI Settings" dialog that the "Tool call" column displays "Support".
Step 2: Write Structured System Instructions
In the "AI Settings → Prompt" field, enter explicit operational instructions defining the agent's retrieval step and output criteria:
Retrieve the travel policy before answering. Return exactly four short bullet points: submission deadline, required documents, Finance review time, and missing policy information. Use only explicit policy facts. Do not calculate dates or introduce additional requirements.Step 3: Attach Knowledge Base and External Tools
- Under the "Dataset" section at the bottom of the configuration panel, click "+ Choose" on the right and select
Corporate Travel Policy. Attaching a knowledge base automatically enables knowledge base retrieval for Chat Agent V2. - To attach additional skills or external tools, click "+ Choose" on the right side of the "Skills" or "Tool" section.
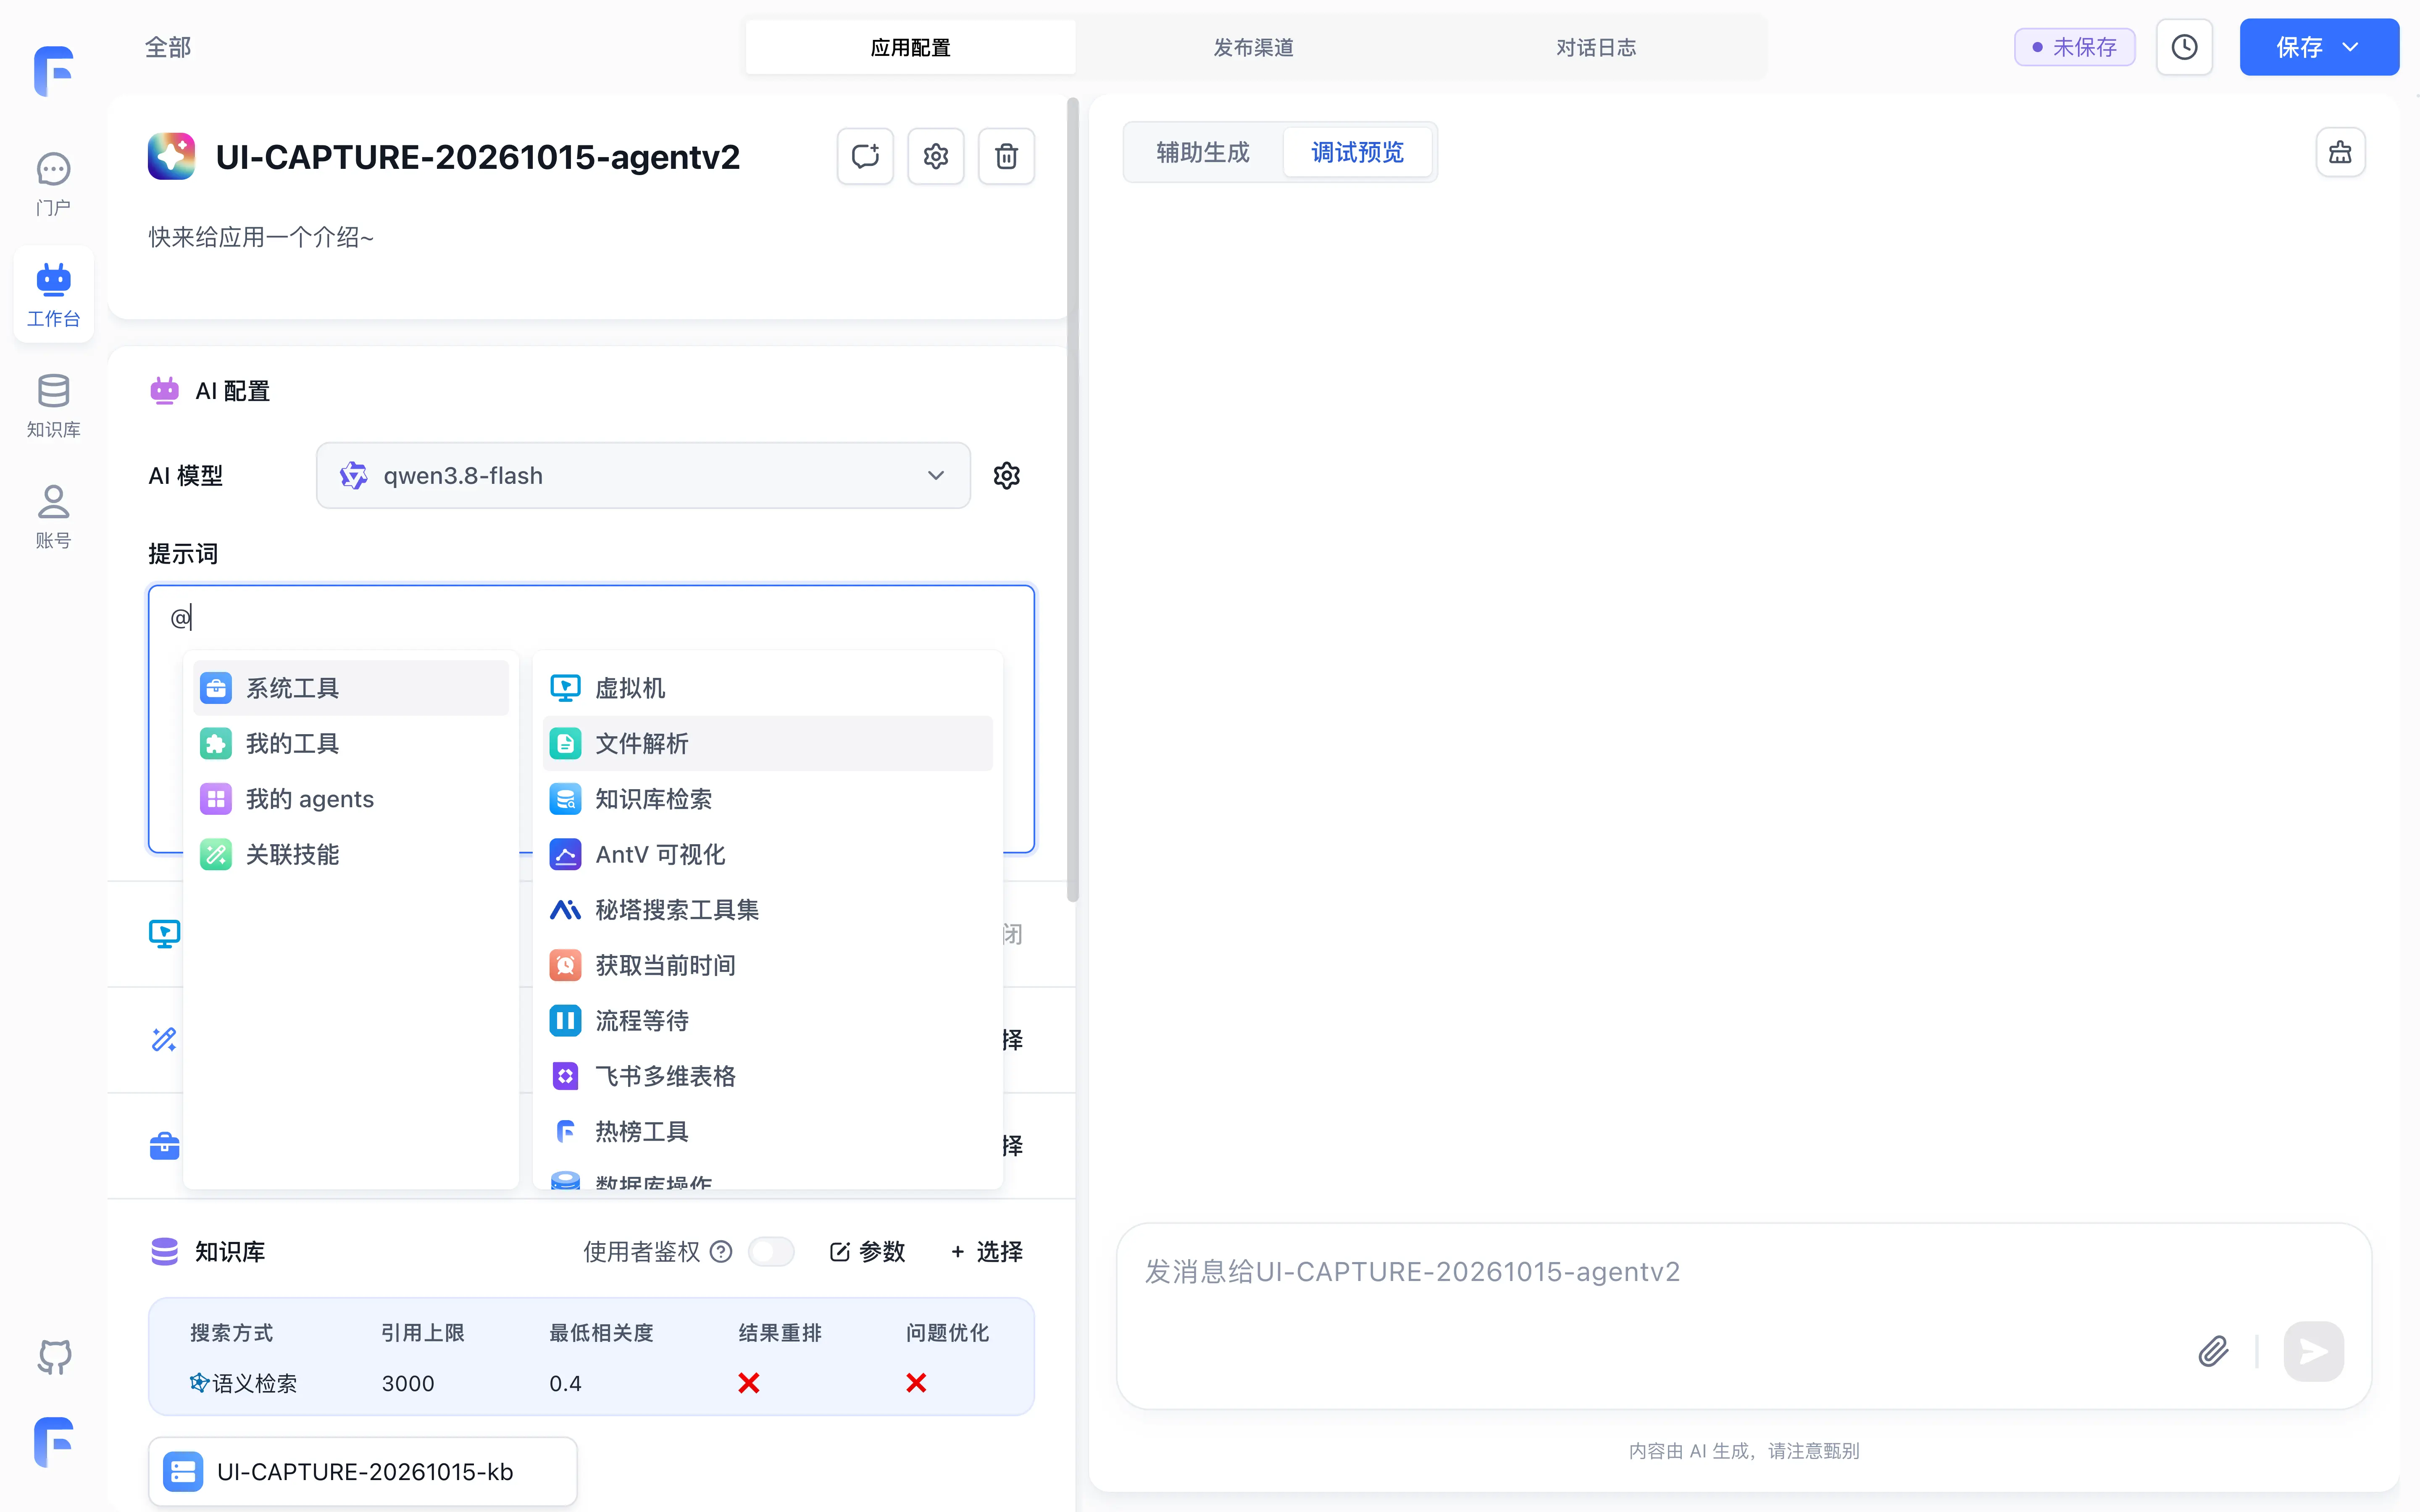
- Type
@inside the "Prompt" editor to open the capability reference menu (shown below), where you can directly reference "DatasetSearch", "Sandbox", "FileParsing", or other tools and skills from "System Tools", "Tools", "My Agents", or "Skills".
Step 4: Test in Workspace and Trace Execution
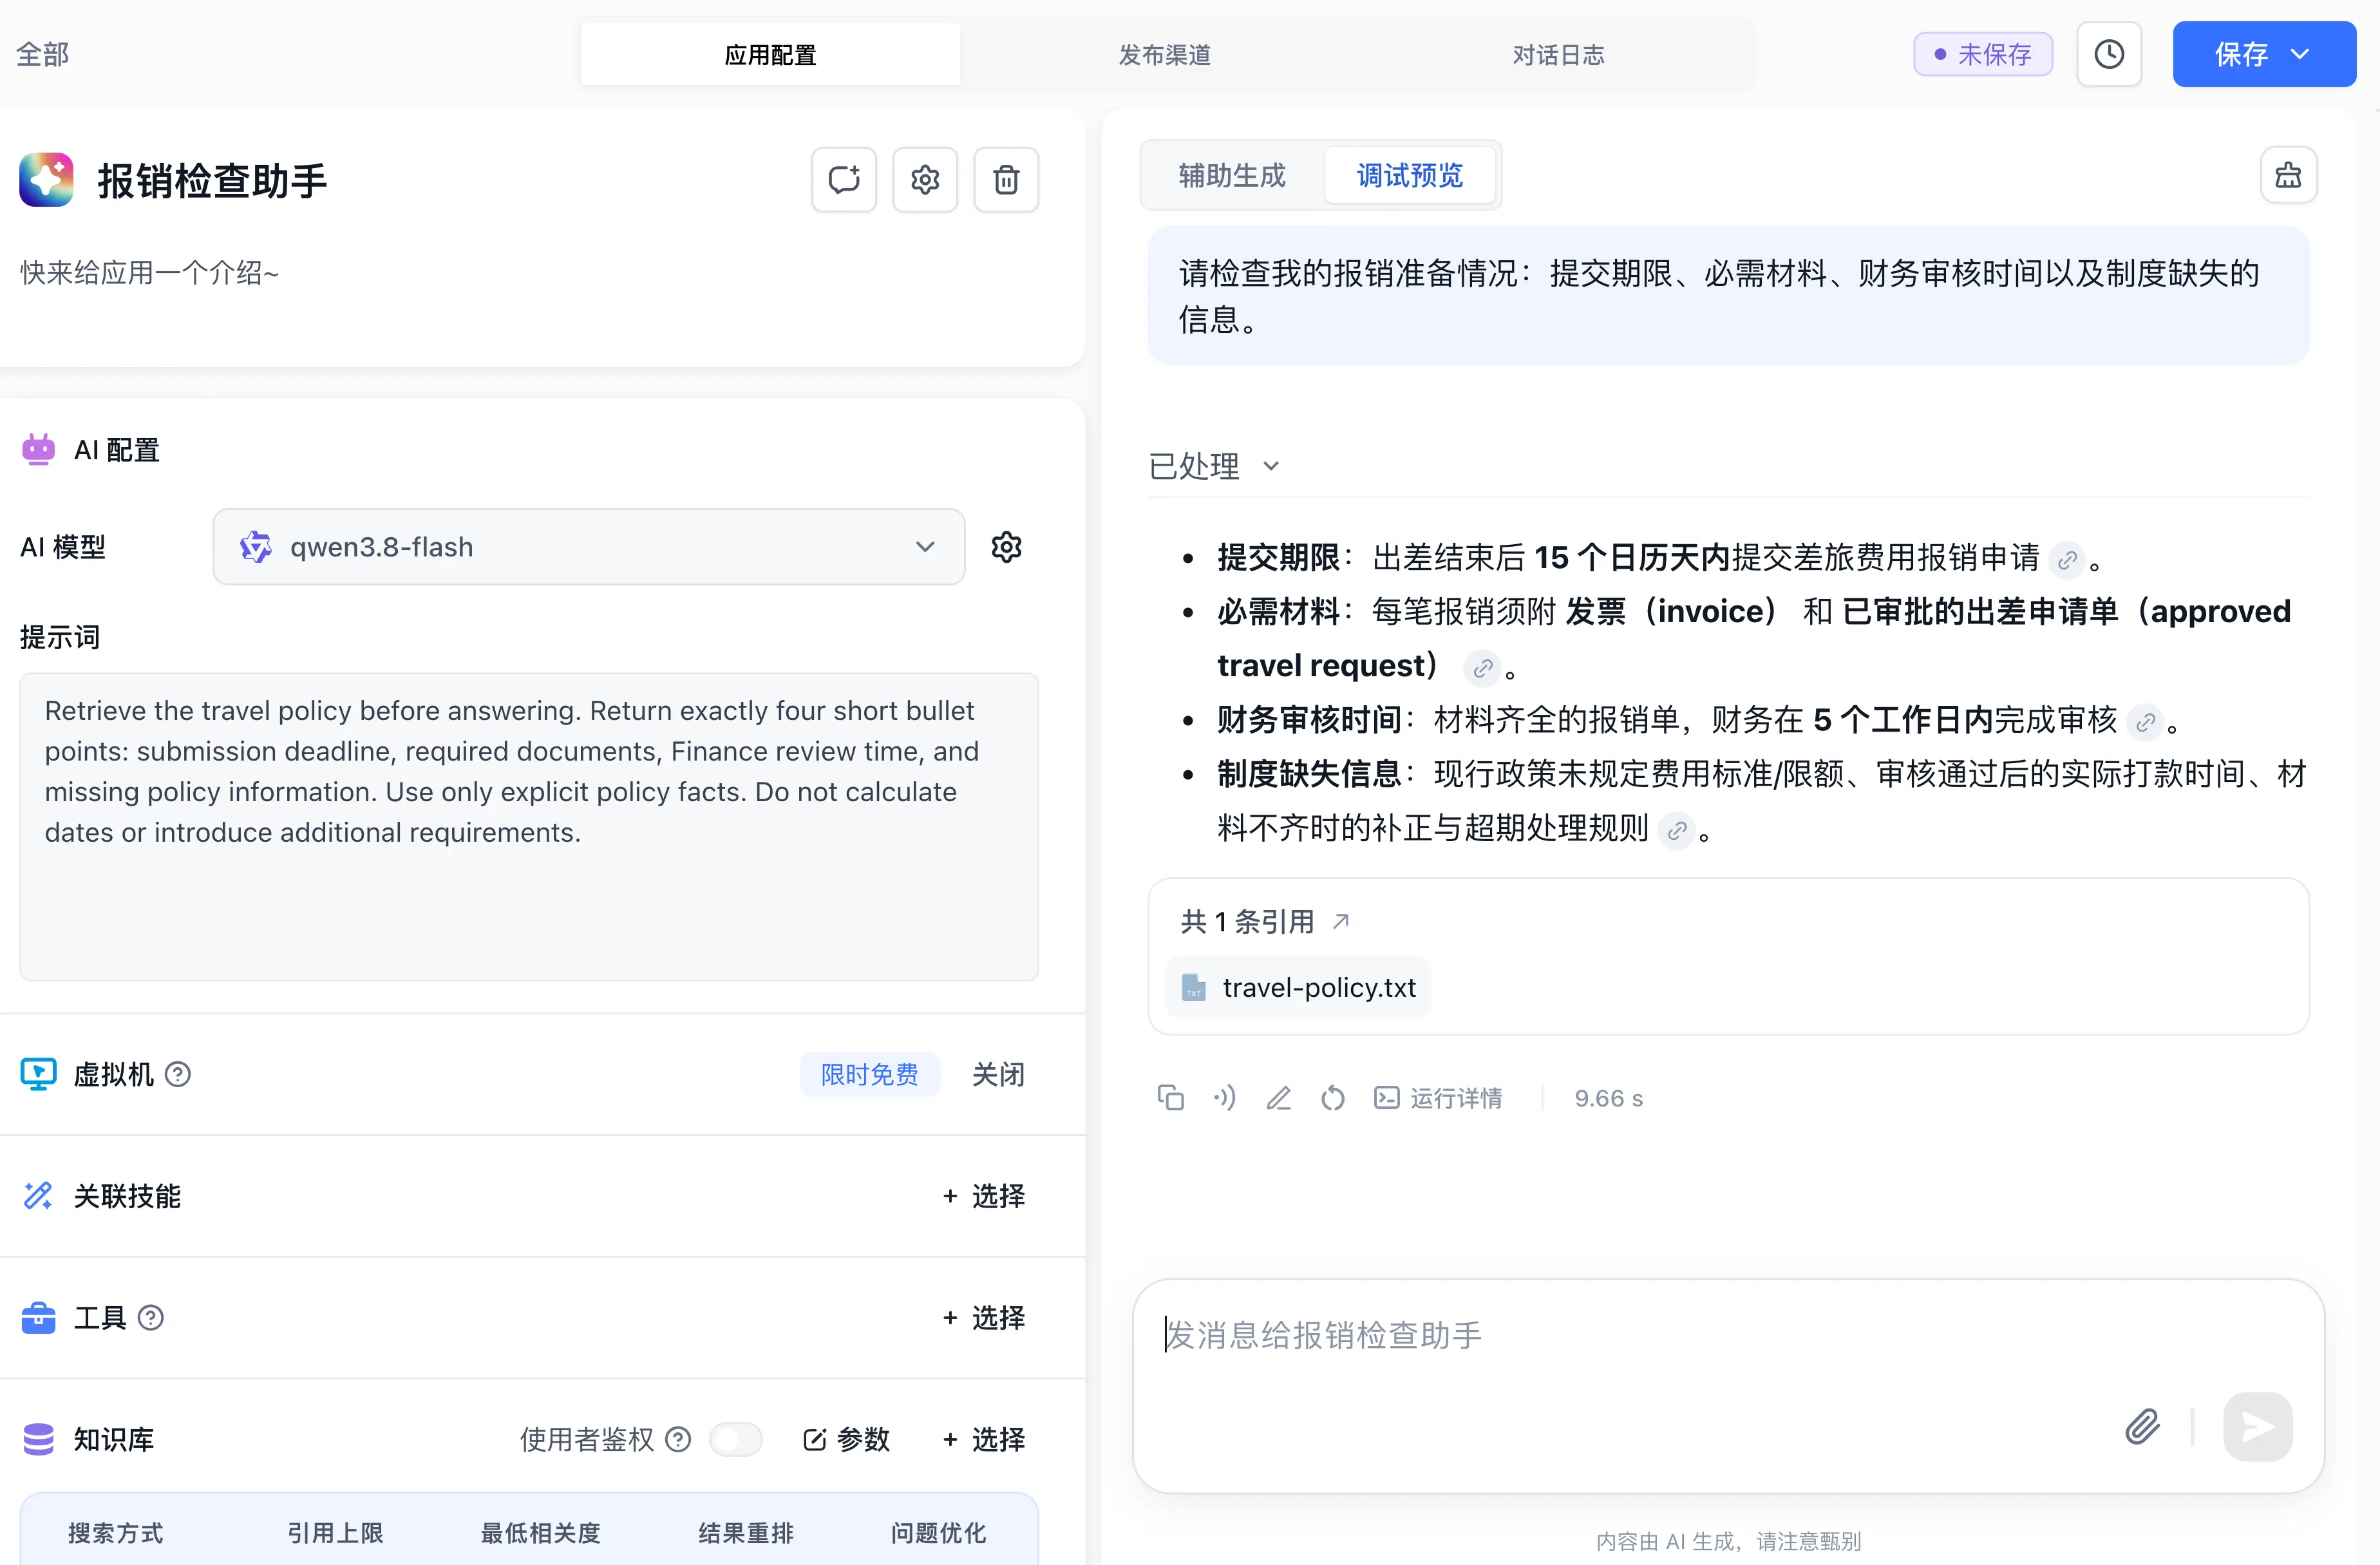
Enter the following test inquiry in the right-hand "Debug preview" panel:
Please check my reimbursement readiness: submission deadline, required documents, Finance review time, and missing policy information.Submit the query and observe the runtime sequence:
- Reasoning: The agent evaluates the query and decides to call the knowledge retrieval tool first.
- Tool Invocation: The agent generates parameters
travel expense deadline documentsand queries the knowledge base. - Observation: The tool returns relevant travel policy chunks (including 15 calendar days and approved request forms).
- Synthesis: The agent synthesizes the retrieved facts into four structured bullet points with citations.
Click "Run Details" below the response to inspect tool inputs, raw tool outputs, and execution duration for each step.
Step 5: Save and Publish the Active Version
- Once the test output satisfies your requirements, click "Save" in the top right corner and choose "Save and Publish" from the dropdown.
- Enter a version name (for example,
Expense Check Assistant v1) in the dialog and click "Confirm". - The platform points the active production pointer to this release, updating all external channels immediately.
Common Troubleshooting
| Symptom | Primary Investigation Path |
|---|---|
| Model answers directly without calling tools | Confirm the chosen model supports Function Calling; strengthen explicit retrieval instructions in the prompt |
| Retrieval returns empty results | Verify that knowledge base indexing is ready; confirm dataset read permissions |
| Tool execution timeout | Check upstream model and network connectivity; examine error traces in execution logs |
Next Steps
- Deterministic logic: Build predictable multi-step pipelines in Build Your First Workflow.
- Advanced parameters: Discover full agent capabilities in Agent V2 Settings.
- Tools and extensions: Add custom operations in Tools and Skills Overview.
Last updated
Quick Start: Build and Publish Your First Q&A Application in 5 Minutes
Follow definite steps to import sample data, connect a Chat Agent, verify responses, and generate a public share link.
Build Your First Workflow
Master visual canvas orchestration, node connections, input and output references, and end-to-end debugging.