DingTalk Bot Integration
FastGPT DingTalk Bot Integration Tutorial
Starting from version 4.8.16, FastGPT commercial edition supports direct DingTalk bot integration without additional APIs.
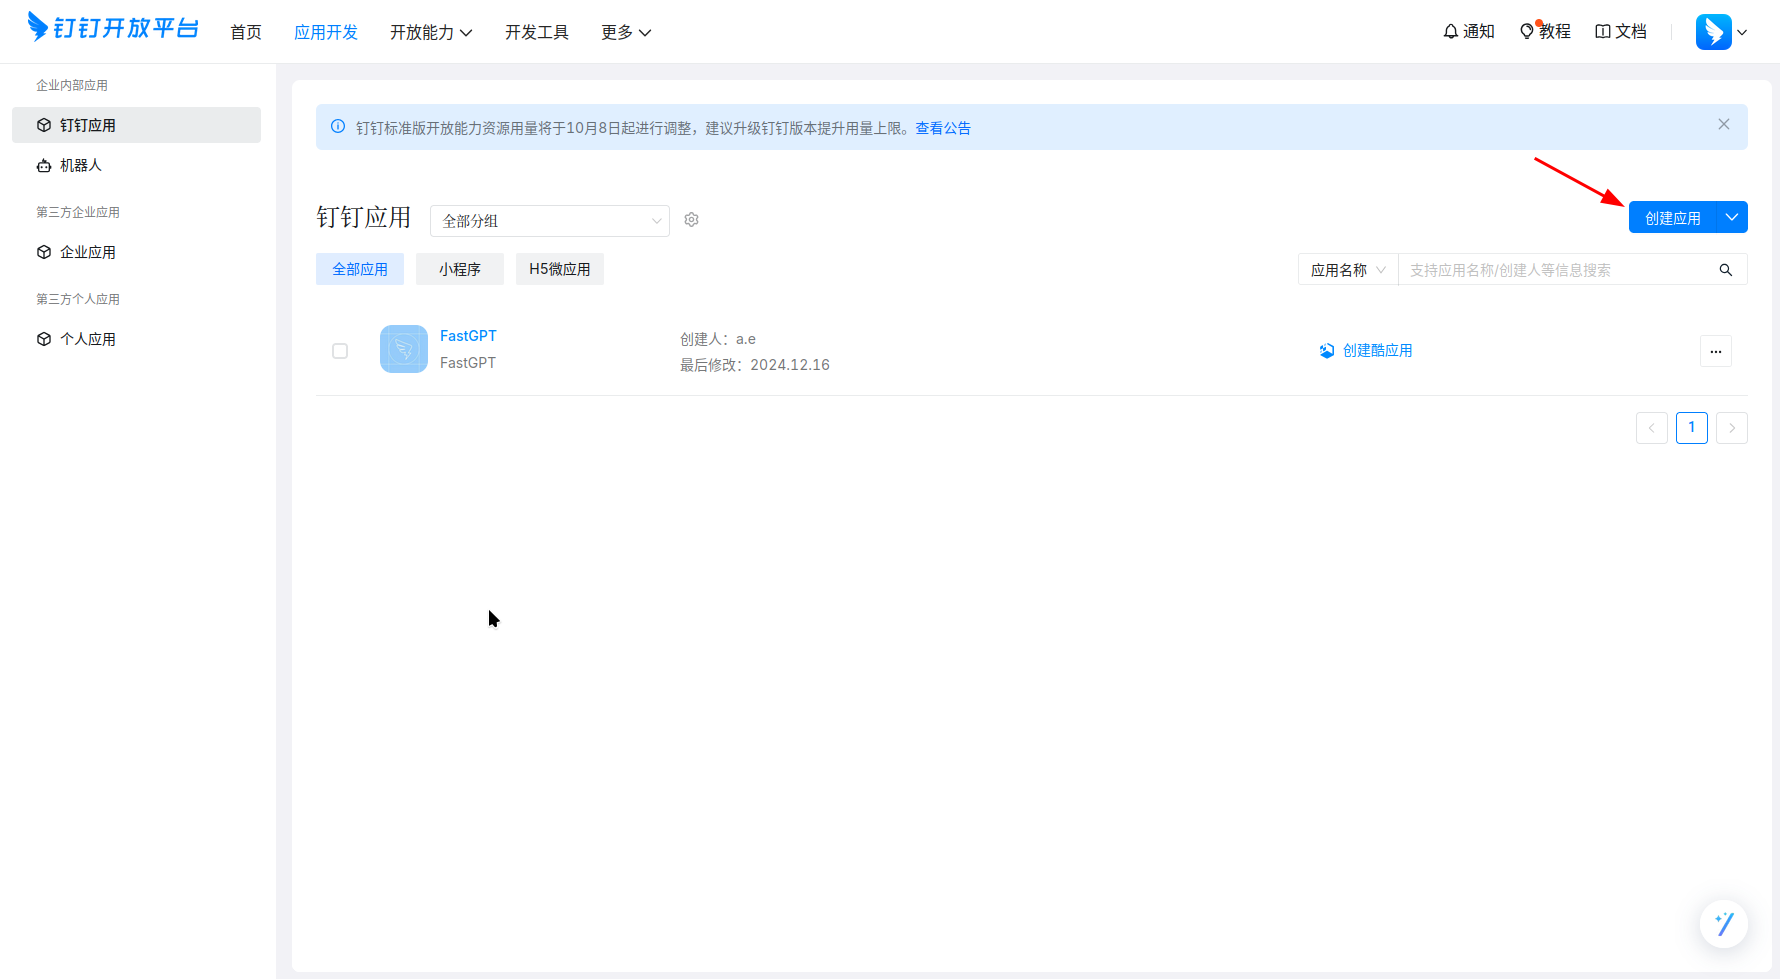
1. Create a DingTalk Internal Enterprise App
- Create an internal enterprise app in the DingTalk Developer Console.
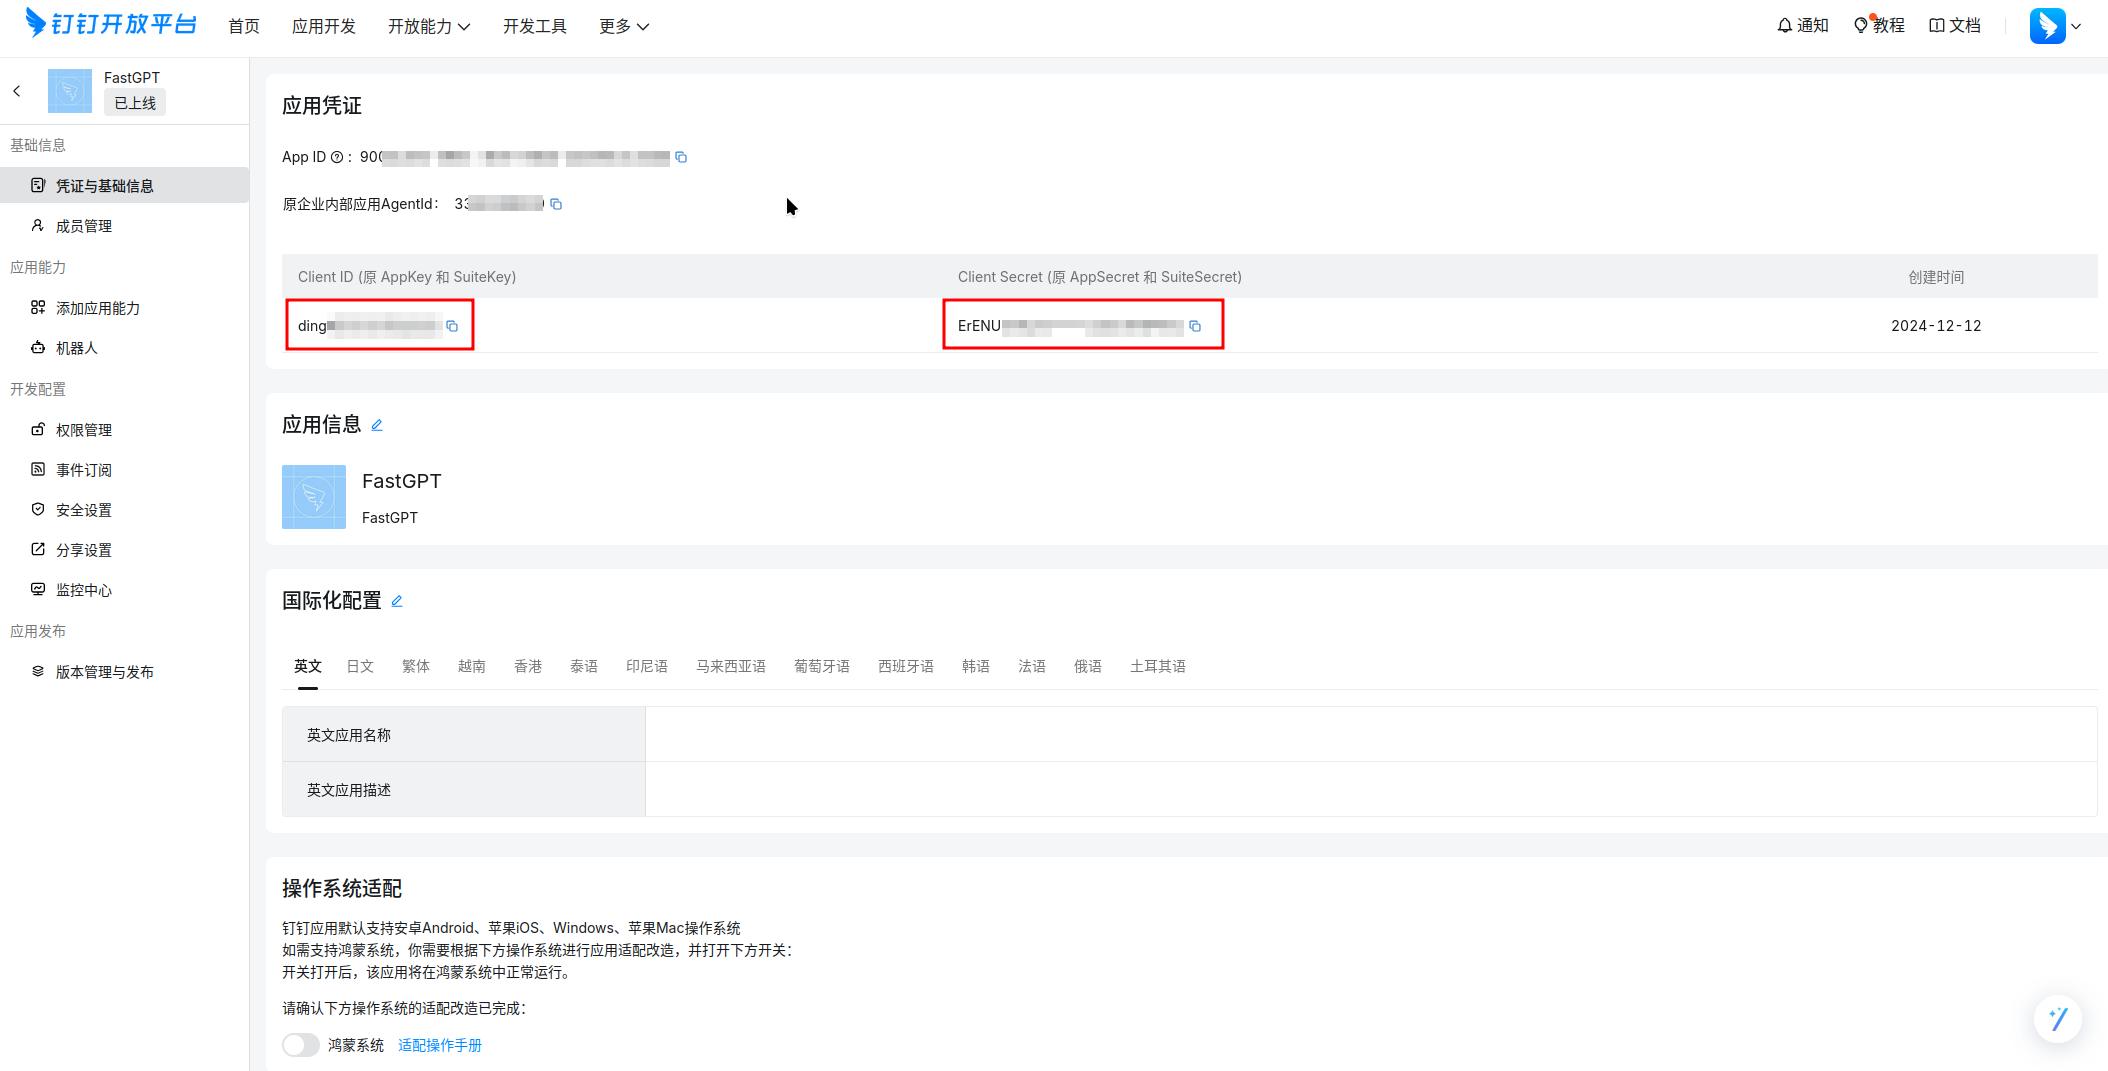
- Obtain the Client ID and Client Secret.
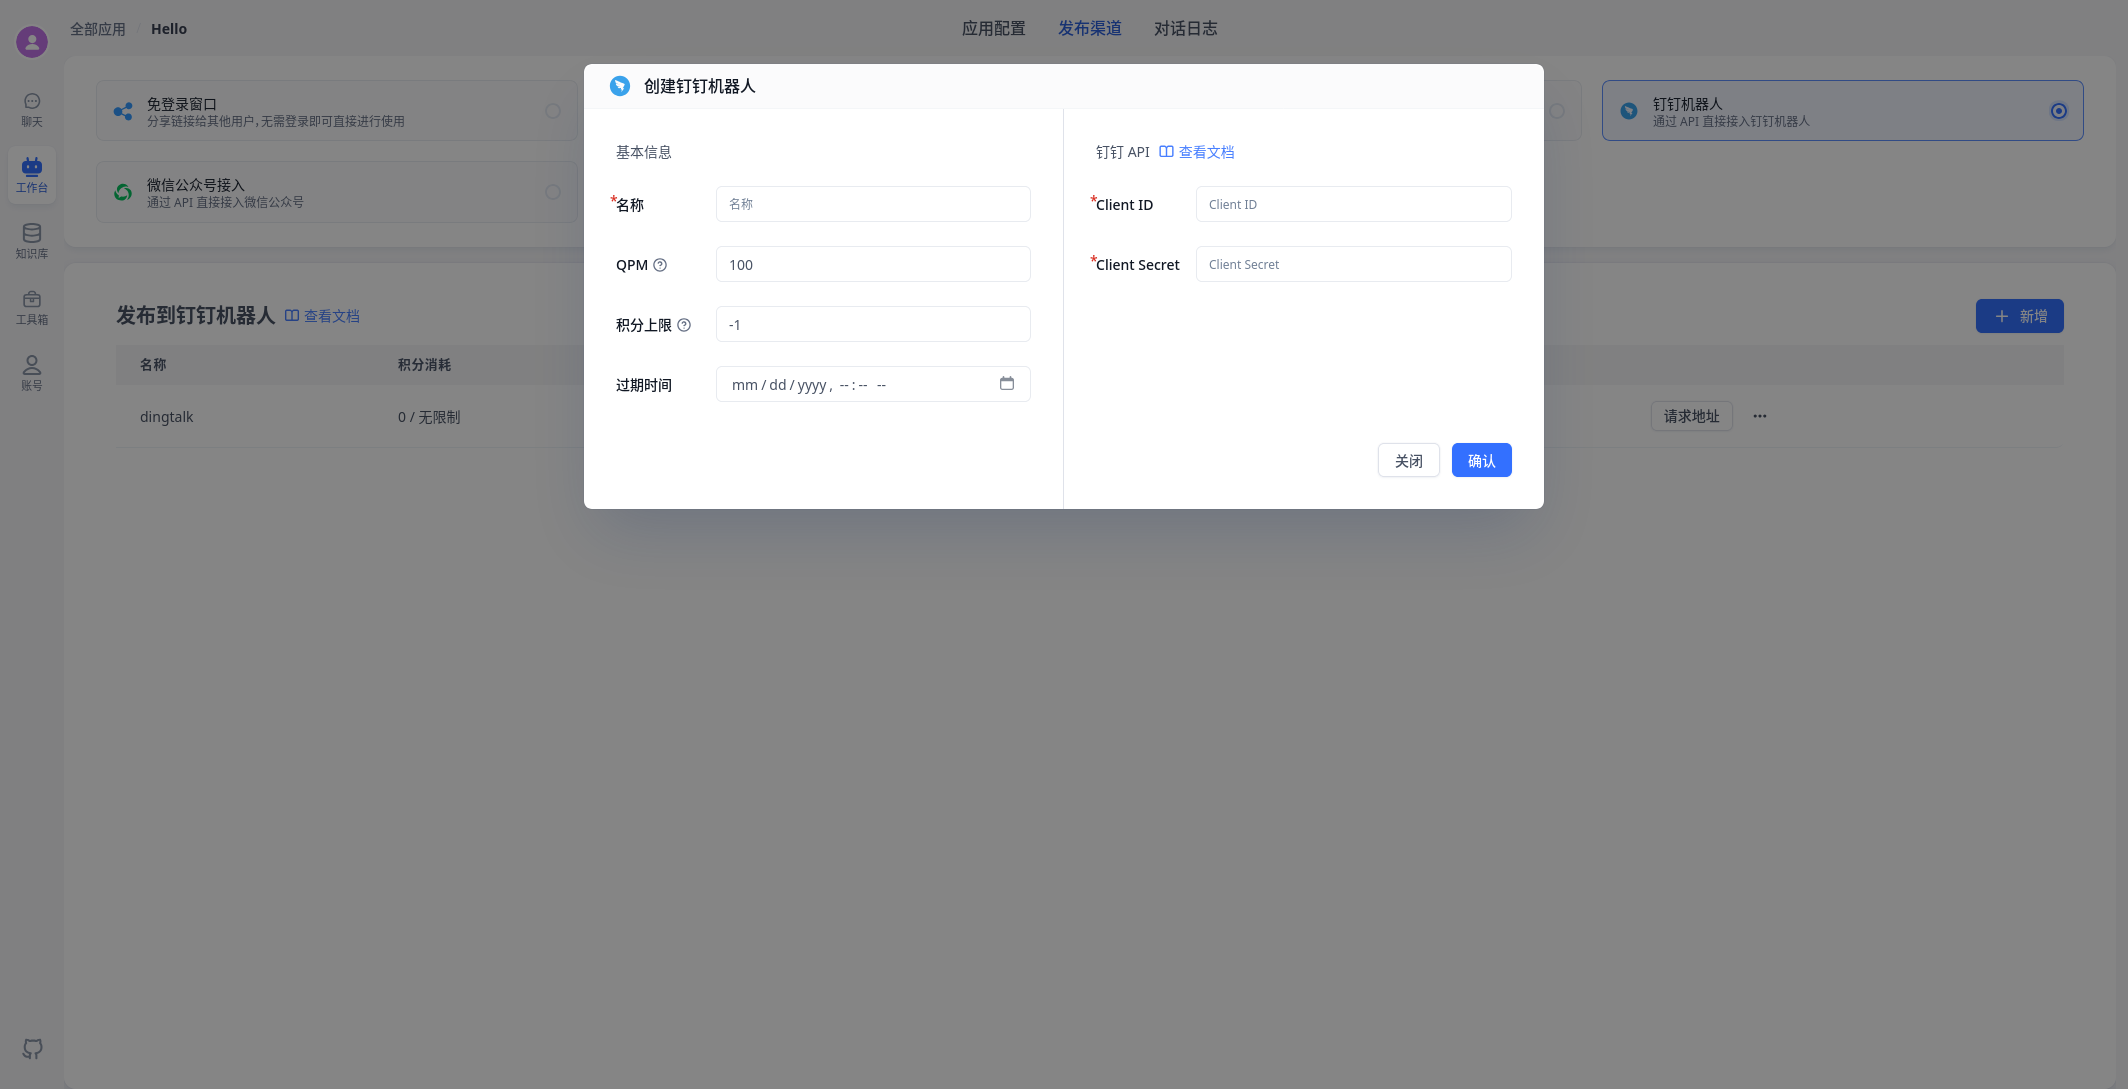
2. Add a Publishing Channel in FastGPT
In FastGPT, select the app you want to integrate. On the Publishing Channels page, create a new DingTalk bot publishing channel.
Enter the Client ID and Client Secret obtained earlier into the configuration dialog.
After creation, click the Request URL button and copy the callback address.
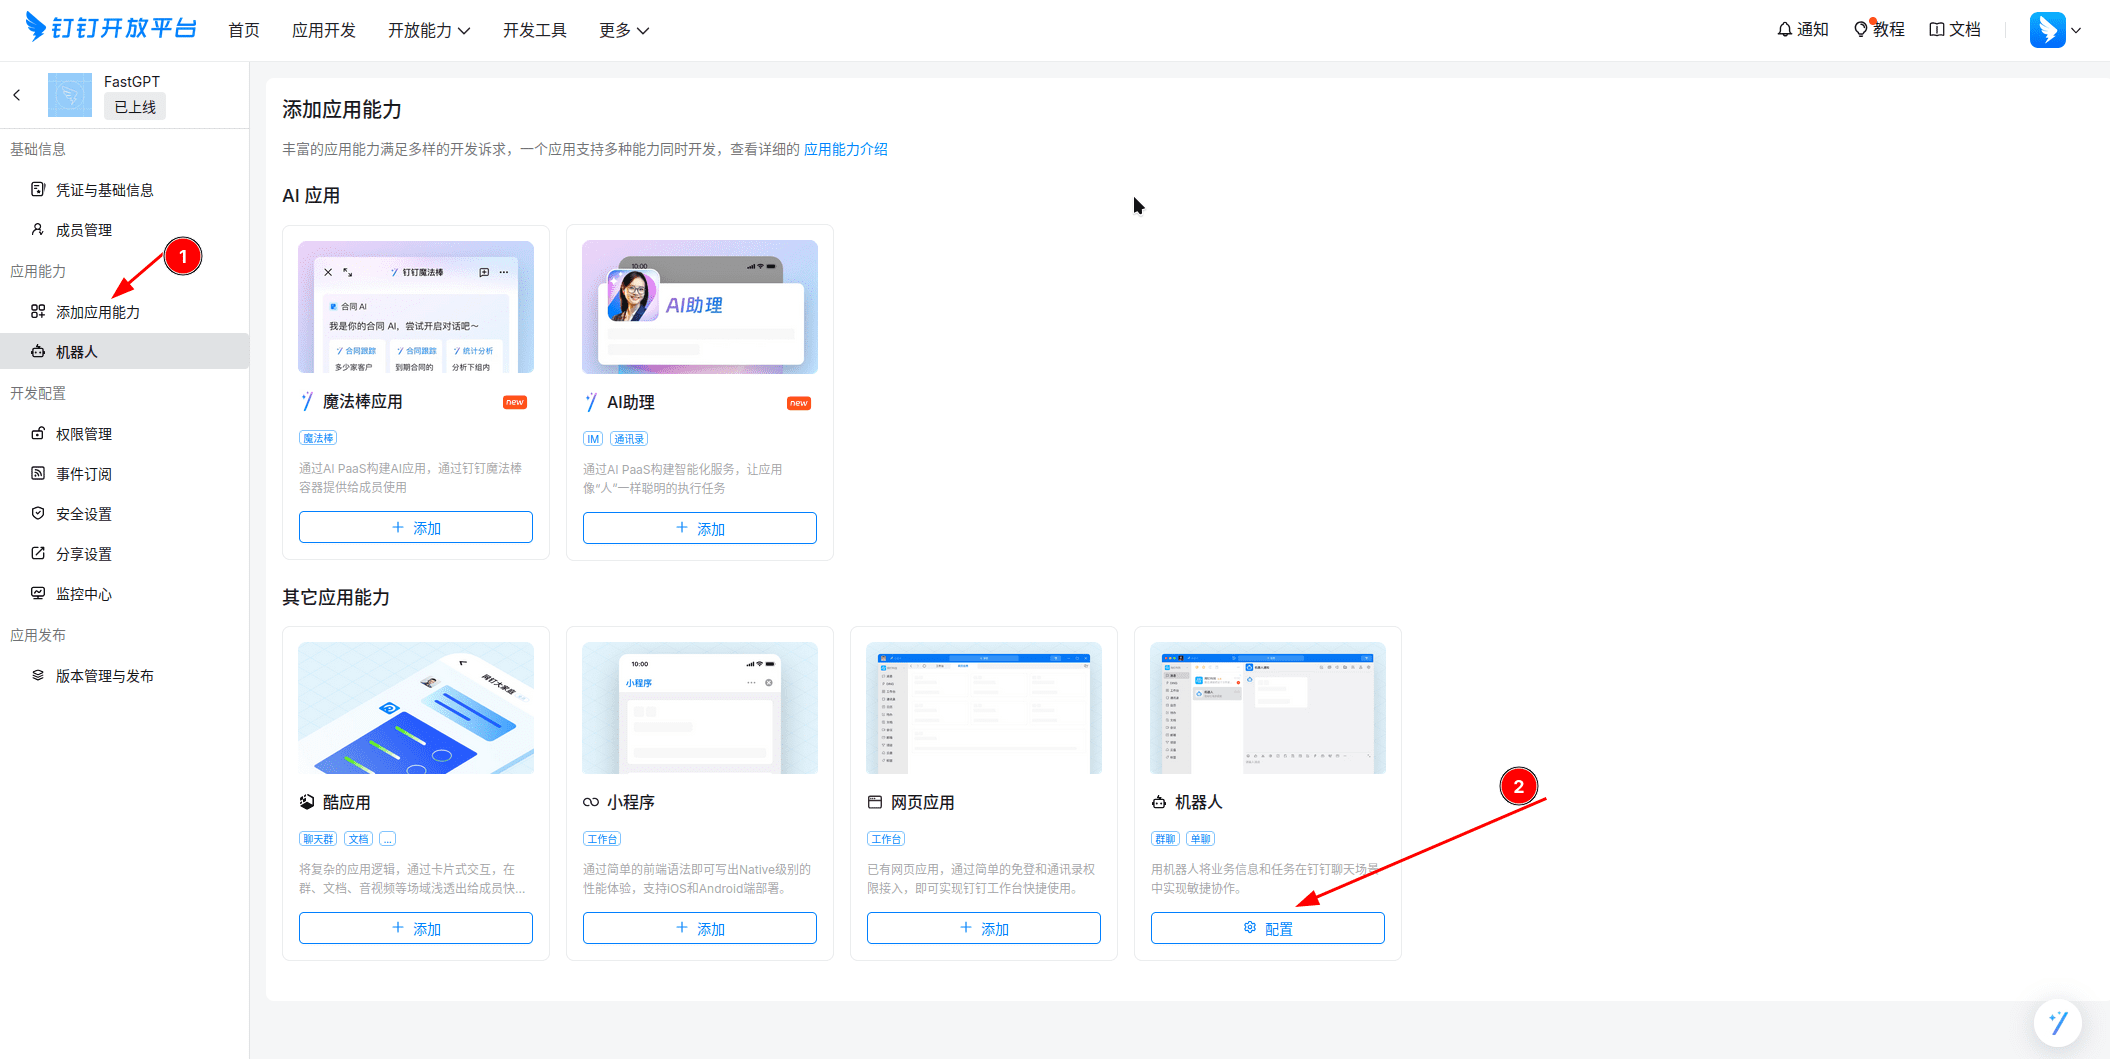
3. Add Bot Capability to the App
In the DingTalk Developer Console, click Add App Capability on the left sidebar, and add the Bot capability to the internal enterprise app you just created.
4. Configure Bot Callback Address
Click the Bot capability on the left sidebar, then set the Message Receiving Mode at the bottom to HTTP Mode, and paste the FastGPT callback address you copied earlier as the message receiving address.
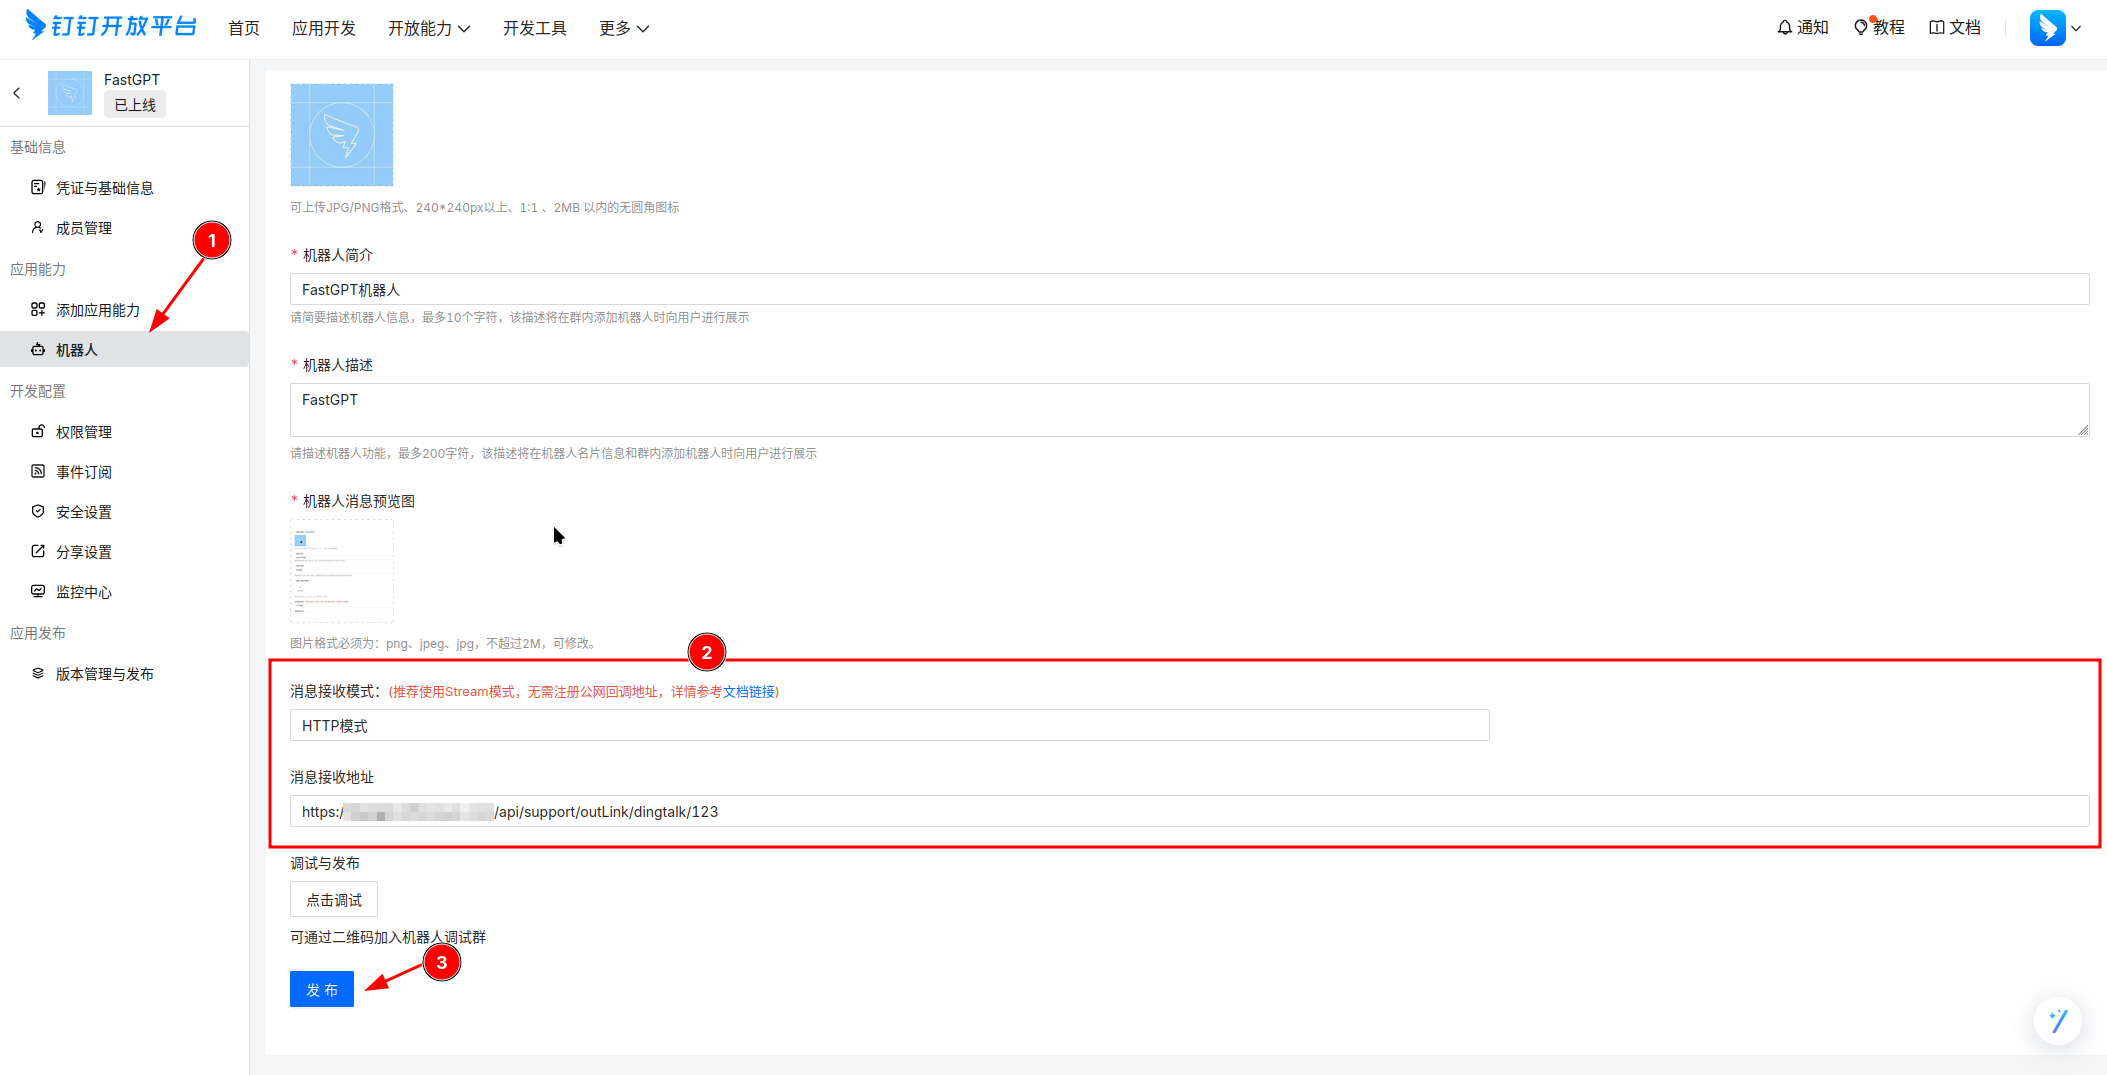
After debugging, click Publish.
5. Publish the App
After the bot is published, you still need to publish the app version on the Version Management and Publishing page.
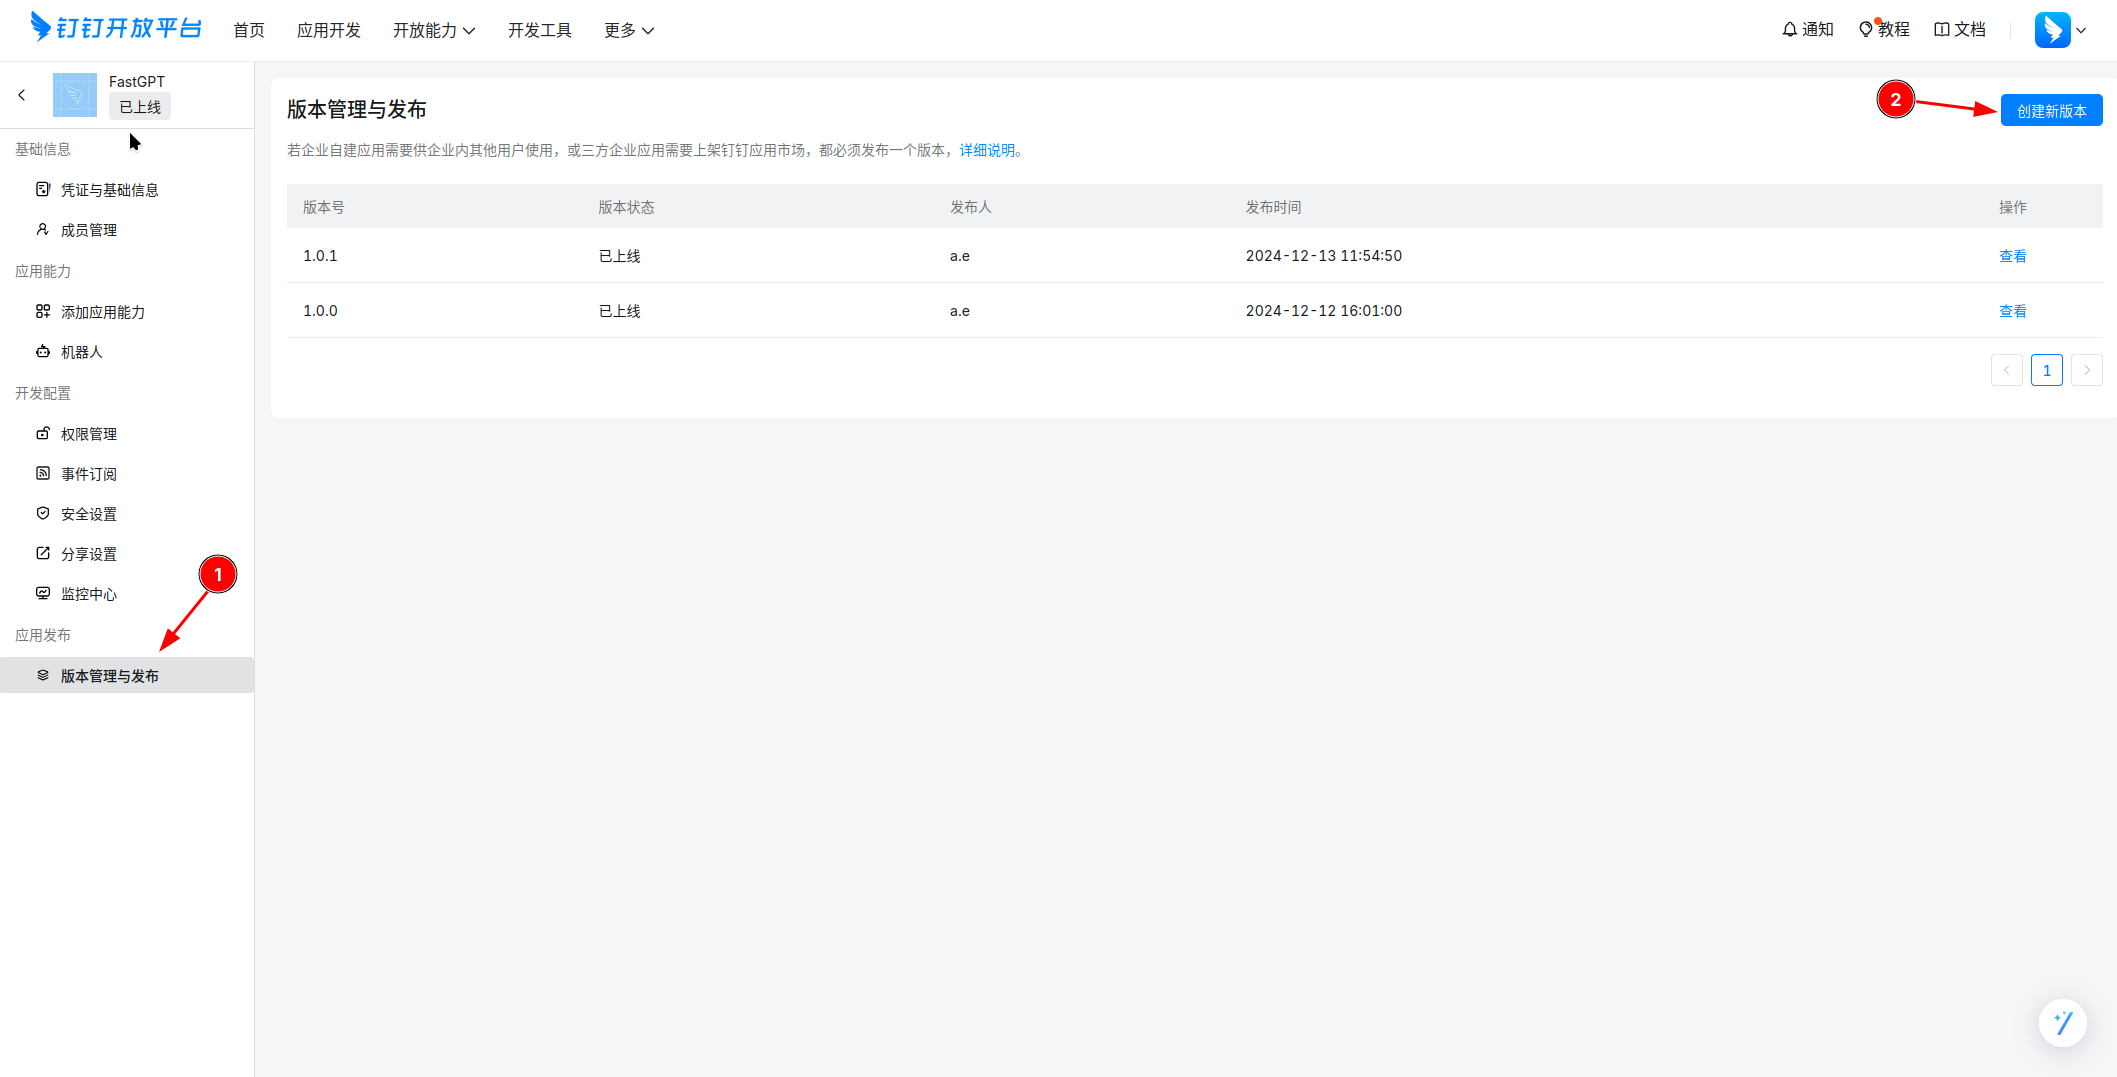
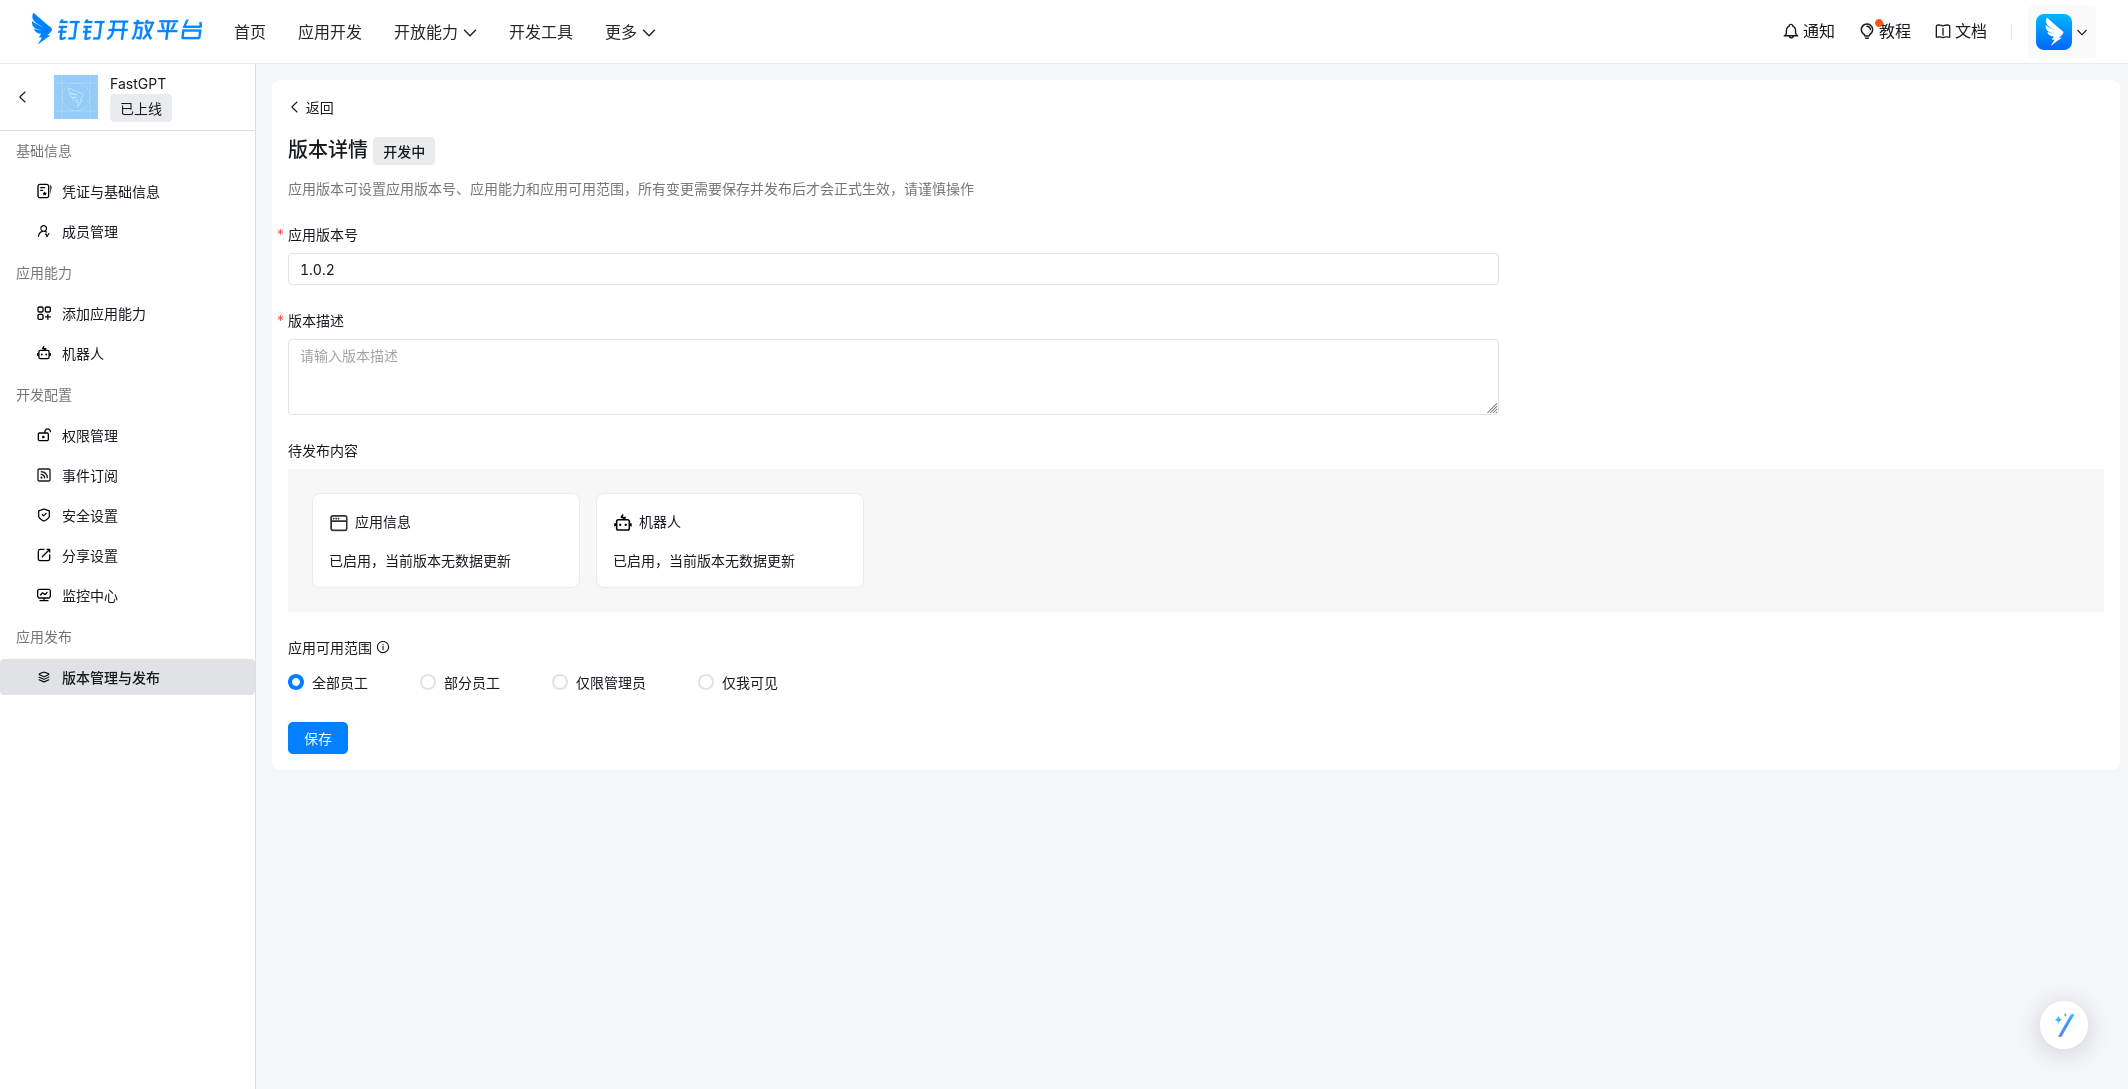
Click Create New Version, set the version number and description, then click save to publish.
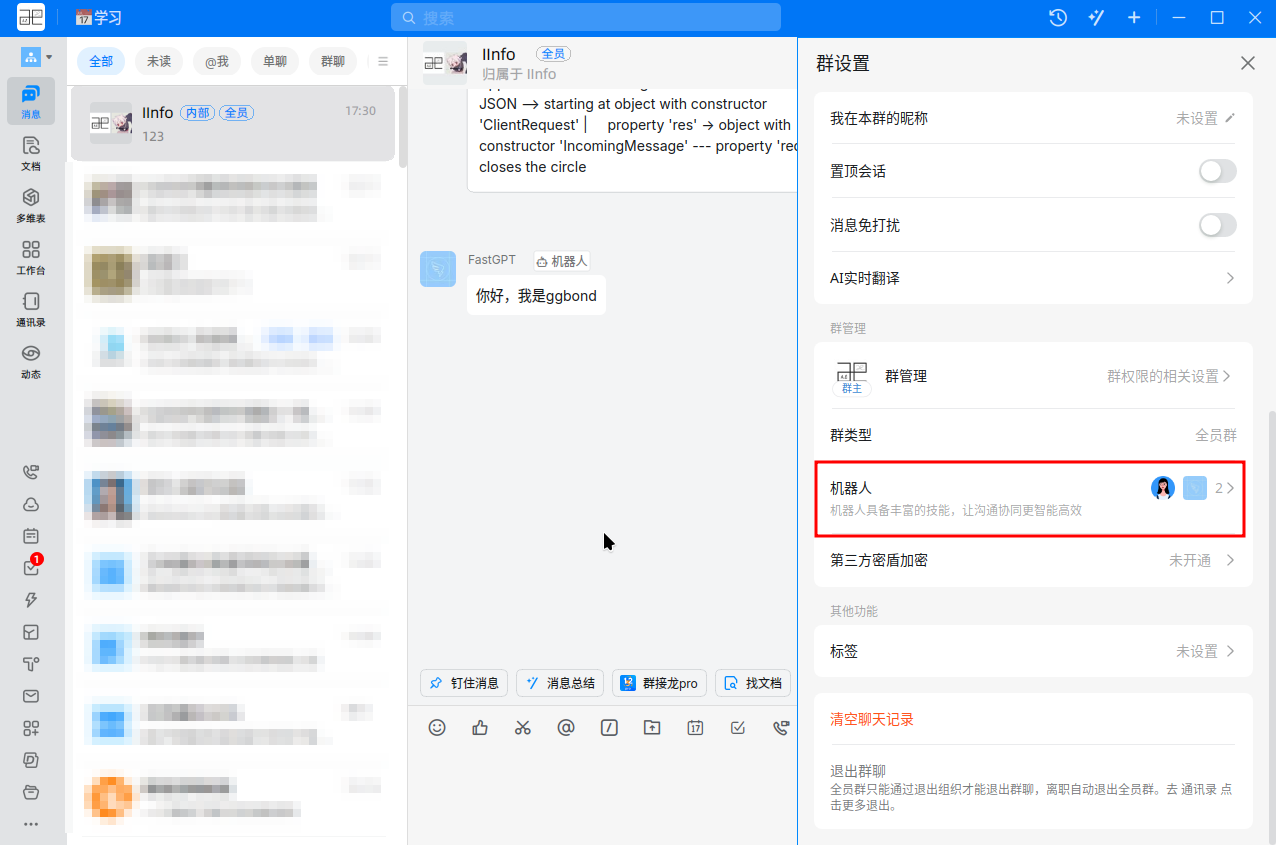
Once the app is published, you can use the bot within your DingTalk enterprise. You can chat with the bot privately, or add the bot to a group and @mention the bot to start a conversation.
FAQ
How to start a new chat history
To reset your chat history, send a Reset message to the bot (case-sensitive), and the bot will start a new chat history.
File Updated