
Integrating Local Models with Xinference (legacy integration)
Deploy local LLMs, embedding models, and rerankers with Xinference and integrate them into your self-hosted FastGPT environment.
This page retains a community model-service example and its historical OneAPI/config.json integration. For current deployments, register the reachable model service through Model configuration and verify model type, endpoint, permissions, and compatibility for your release.
Xinference is an open-source model inference platform. Beyond LLMs, it can also deploy Embedding and Rerank models, which are critical for enterprise-grade RAG. Xinference also provides advanced features like Function Calling and supports distributed deployment, meaning it can scale horizontally as your workload grows.
Installing Xinference
Xinference supports multiple inference engines as backends for different deployment scenarios. Below we introduce these backends by use case.
1. Server
If you're deploying LLMs on a Linux or Windows server, you can choose Transformers or vLLM as Xinference's inference backend:
- Transformers: By integrating Hugging Face's Transformers library, Xinference can quickly adopt the most cutting-edge NLP models, including LLMs.
- vLLM: An open-source library developed by UC Berkeley for efficiently serving LLMs. It introduces the PagedAttention algorithm for improved memory management of attention keys and values. Throughput can reach 24x that of Transformers, making vLLM suitable for production environments with high-concurrency access.
If your server has an NVIDIA GPU, refer to this article for CUDA installation instructions to maximize GPU acceleration with Xinference.
Docker Deployment
Use Xinference's official Docker image for one-click installation and startup (make sure Docker is installed):
docker run -p 9997:9997 --gpus all xprobe/xinference:latest xinference-local -H 0.0.0.0Direct Deployment
First, prepare a Python 3.9+ environment. We recommend installing conda first, then creating a Python 3.11 environment:
conda create --name py311 python=3.11
conda activate py311
Install Xinference with Transformers and vLLM as inference backends:
pip install "xinference[transformers]"
pip install "xinference[vllm]"
pip install "xinference[transformers,vllm]" # Install both
PyPI automatically installs PyTorch with Transformers and vLLM, but the auto-installed CUDA version may not match your environment. If so, manually install per PyTorch's installation guide.
Start the Xinference service:
xinference-local -H 0.0.0.0Xinference starts locally on port 9997 by default. With the -H 0.0.0.0 parameter, non-local clients can access the service via the machine's IP address.
2. Personal Devices
To deploy LLMs on your MacBook or personal computer, we recommend CTransformers as Xinference's inference backend. CTransformers is a C++ implementation of Transformers using GGML.
GGML is a C++ library that enables LLMs to run on consumer hardware. Its key feature is model quantization -- reducing weight precision to lower resource requirements. For example, representing a high-precision float (like 0.0001) requires more space than a low-precision one (like 0.1). Since LLMs must be loaded into memory for inference, you need sufficient disk space for storage and enough RAM for execution. GGML supports many quantization strategies, each offering different efficiency-performance trade-offs.
Install CTransformers as Xinference's backend:
pip install xinference
pip install ctransformers
Since GGML is a C++ library, Xinference uses llama-cpp-python for language bindings. Different hardware platforms require different compilation parameters:
- Apple Metal (MPS):
CMAKE_ARGS="-DLLAMA_METAL=on" pip install llama-cpp-python - Nvidia GPU:
CMAKE_ARGS="-DLLAMA_CUBLAS=on" pip install llama-cpp-python - AMD GPU:
CMAKE_ARGS="-DLLAMA_HIPBLAS=on" pip install llama-cpp-python
After installation, run xinference-local to start the Xinference service on your Mac.
Creating and Deploying Models (Qwen-14B Example)
1. Launch via WebUI
After starting Xinference, open http://127.0.0.1:9997 in your browser to access the Xinference Web UI.
Go to the "Launch Model" tab, search for qwen-chat, select the launch parameters, then click the rocket button in the lower left of the model card to deploy. The default Model UID is qwen-chat (used to access the model later).
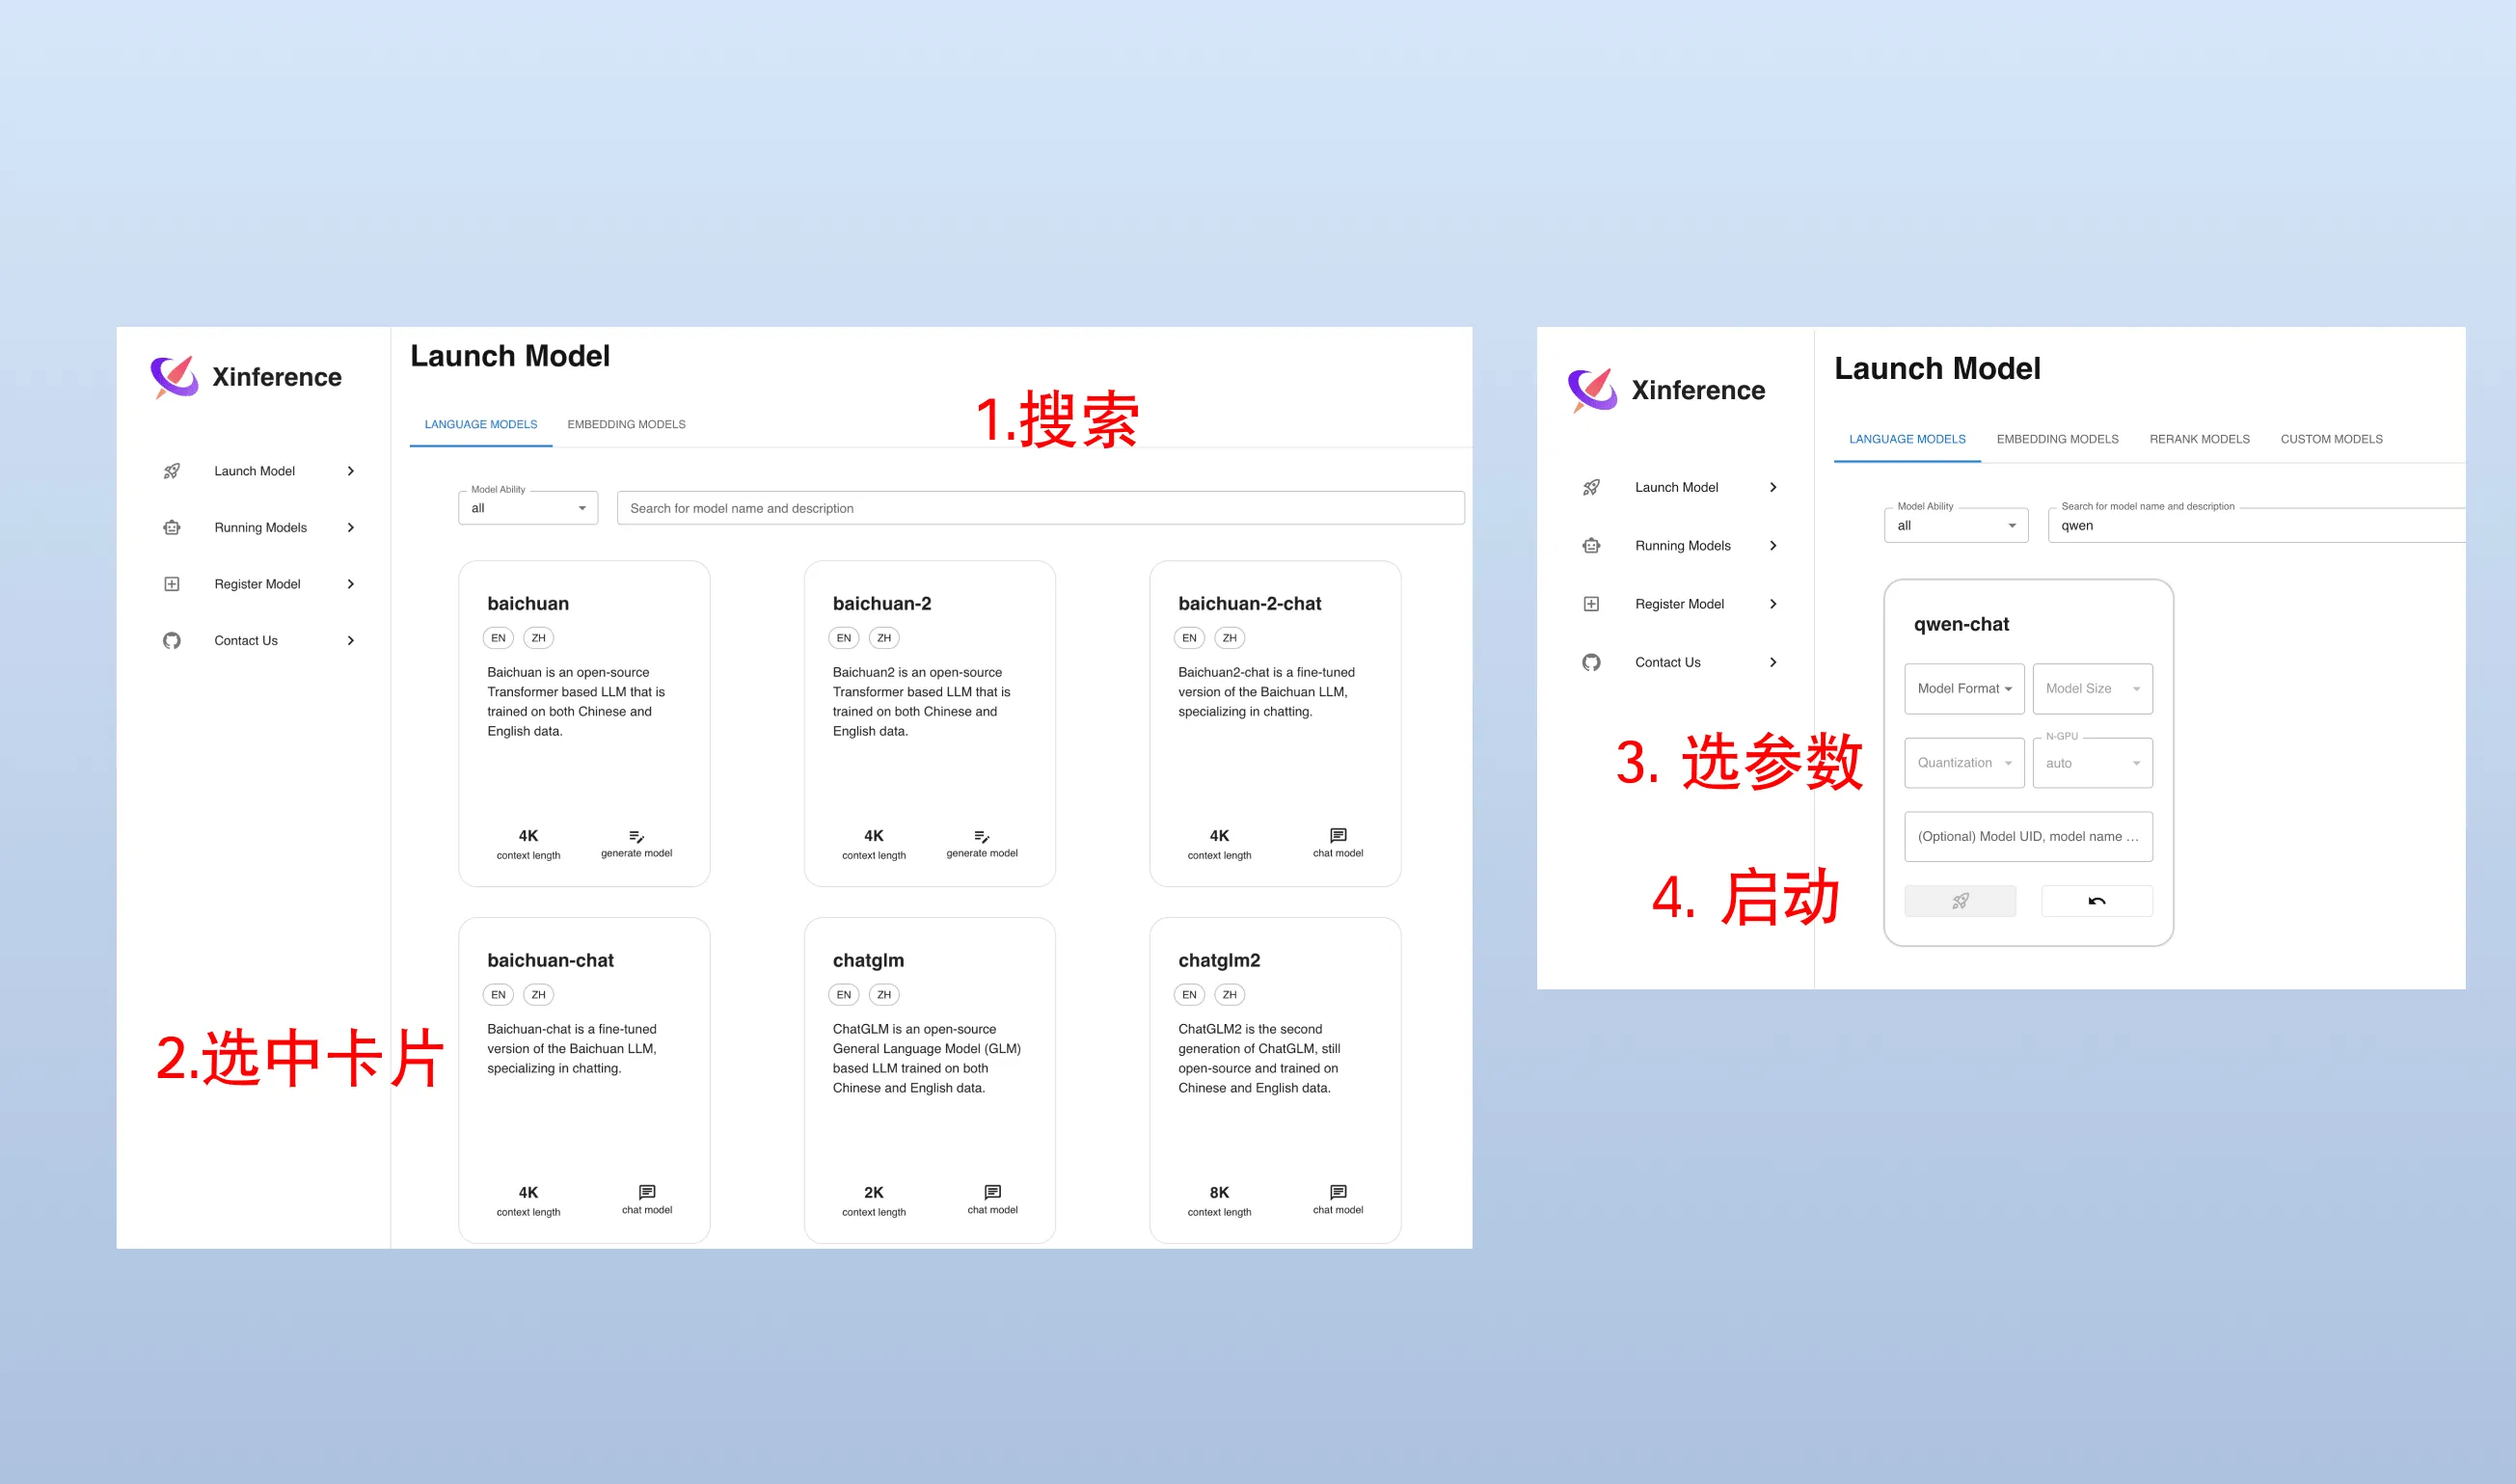
On first launch, Xinference downloads model parameters from HuggingFace, which takes a few minutes. Model files are cached locally for subsequent launches. Xinference also supports downloading from other sources like modelscope.
2. Launch via Command Line
You can also use Xinference's CLI to launch models. The default Model UID is qwen-chat.
xinference launch -n qwen-chat -s 14 -f pytorchBeyond WebUI and CLI, Xinference also provides Python SDK and RESTful API. For more details, see the Xinference documentation.
Integrate Local Models with One API
The legacy One API workflow is shown below. For current versions, connect your service through an AI Proxy channel in Model configuration.
Add a channel for qwen-chat. Set the Base URL to the Xinference service endpoint and register qwen-chat (the model's UID).
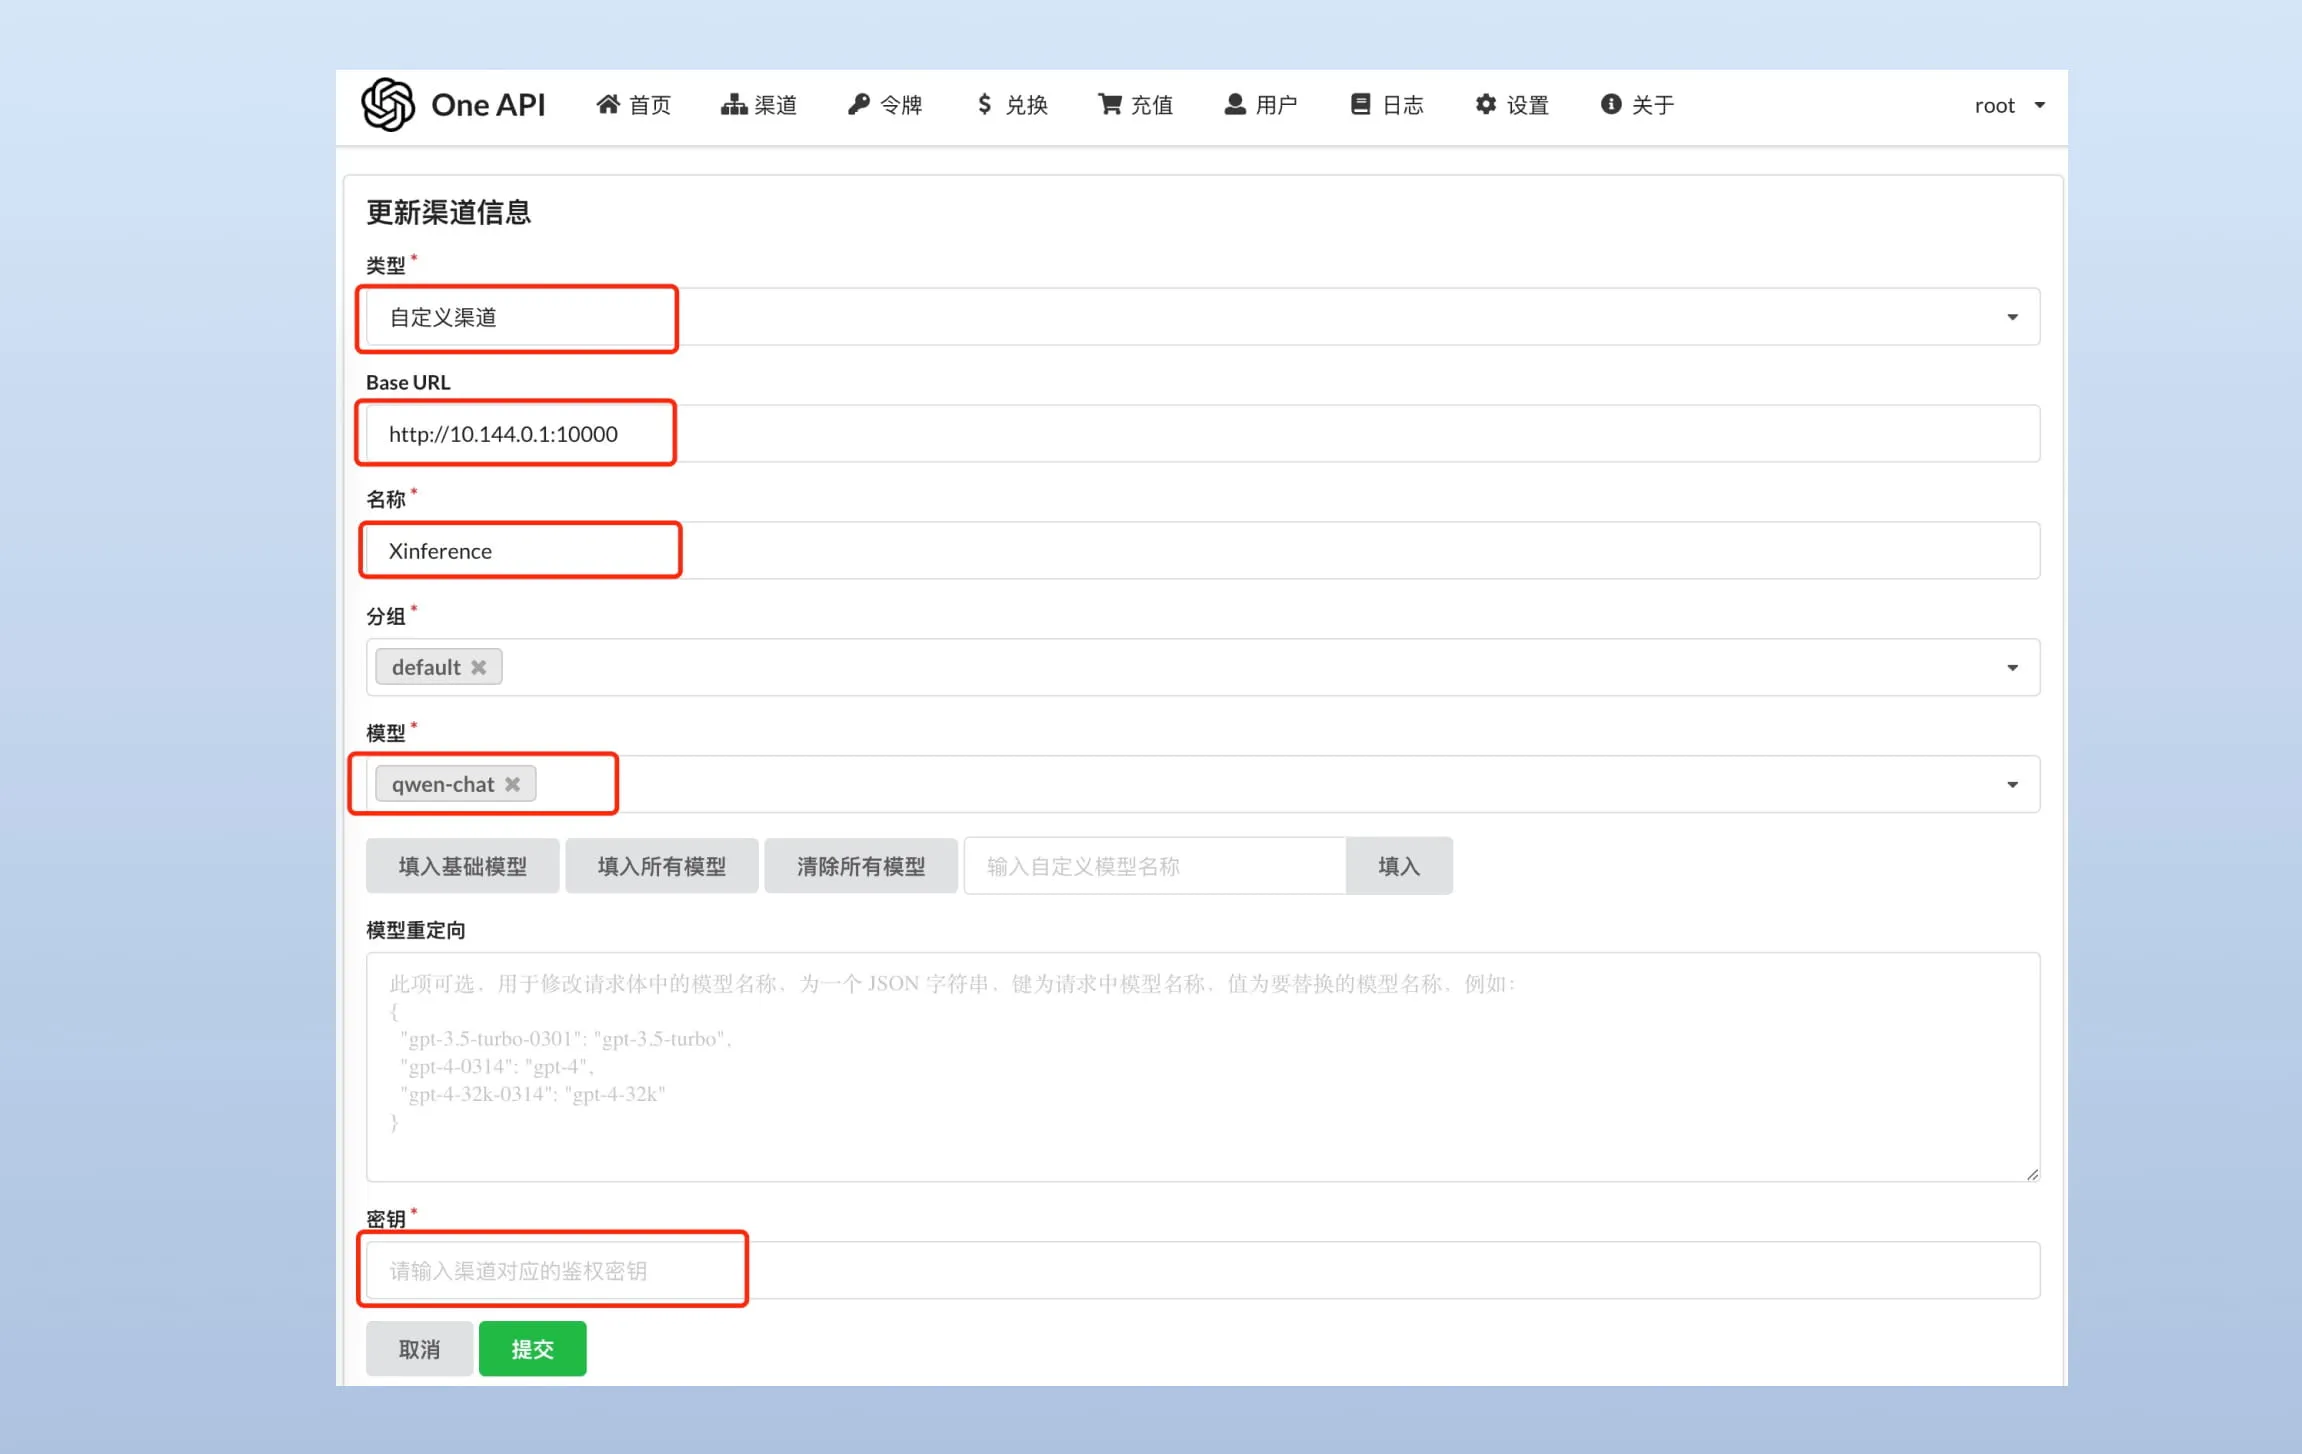
Test with this command:
curl --location --request POST 'https://[oneapi_url]/v1/chat/completions' \
--header 'Authorization: Bearer [oneapi_token]' \
--header 'Content-Type: application/json' \
--data-raw '{
  "model": "qwen-chat",
  "messages": [{"role": "user", "content": "Hello!"}]
}'
Replace [oneapi_url] with your One API address and [oneapi_token] with your One API token. The model field should match the custom model name you entered in One API.
Integrate Local Models with FastGPT
Add the qwen-chat model to the llmModels section of FastGPT's config.json:
...
  "llmModels": [
    {
      "model": "qwen-chat", // Model name (matches the channel model name in OneAPI)
      "name": "Qwen", // Display name
      "avatar": "/imgs/model/Qwen.svg", // Model logo
      "maxContext": 125000, // Max context length
      "maxResponse": 4000, // Max response length
      "quoteMaxToken": 120000, // Max citation content tokens
      "maxTemperature": 1.2, // Max temperature
      "charsPointsPrice": 0, // Points per 1K characters (legacy Commercial Edition field)
      "censor": false, // Enable content moderation (Commercial Edition)
      "vision": true, // Supports image input
      "toolChoice": true, // Supports tool choice (used in classification, extraction, tool calling)
      "functionCall": false, // Supports function calling (used in classification, extraction, tool calling. toolChoice takes priority; if false, falls back to functionCall; if still false, uses prompt mode)
      "customCQPrompt": "", // Custom classification prompt (for models without tool/function calling support)
      "customExtractPrompt": "", // Custom content extraction prompt
      "defaultSystemChatPrompt": "", // Default system prompt for conversations
      "defaultConfig": {} // Default config sent with API requests (e.g., GLM4's top_p)
    }
  ],
...
Restart FastGPT to select the Qwen model in app configuration:
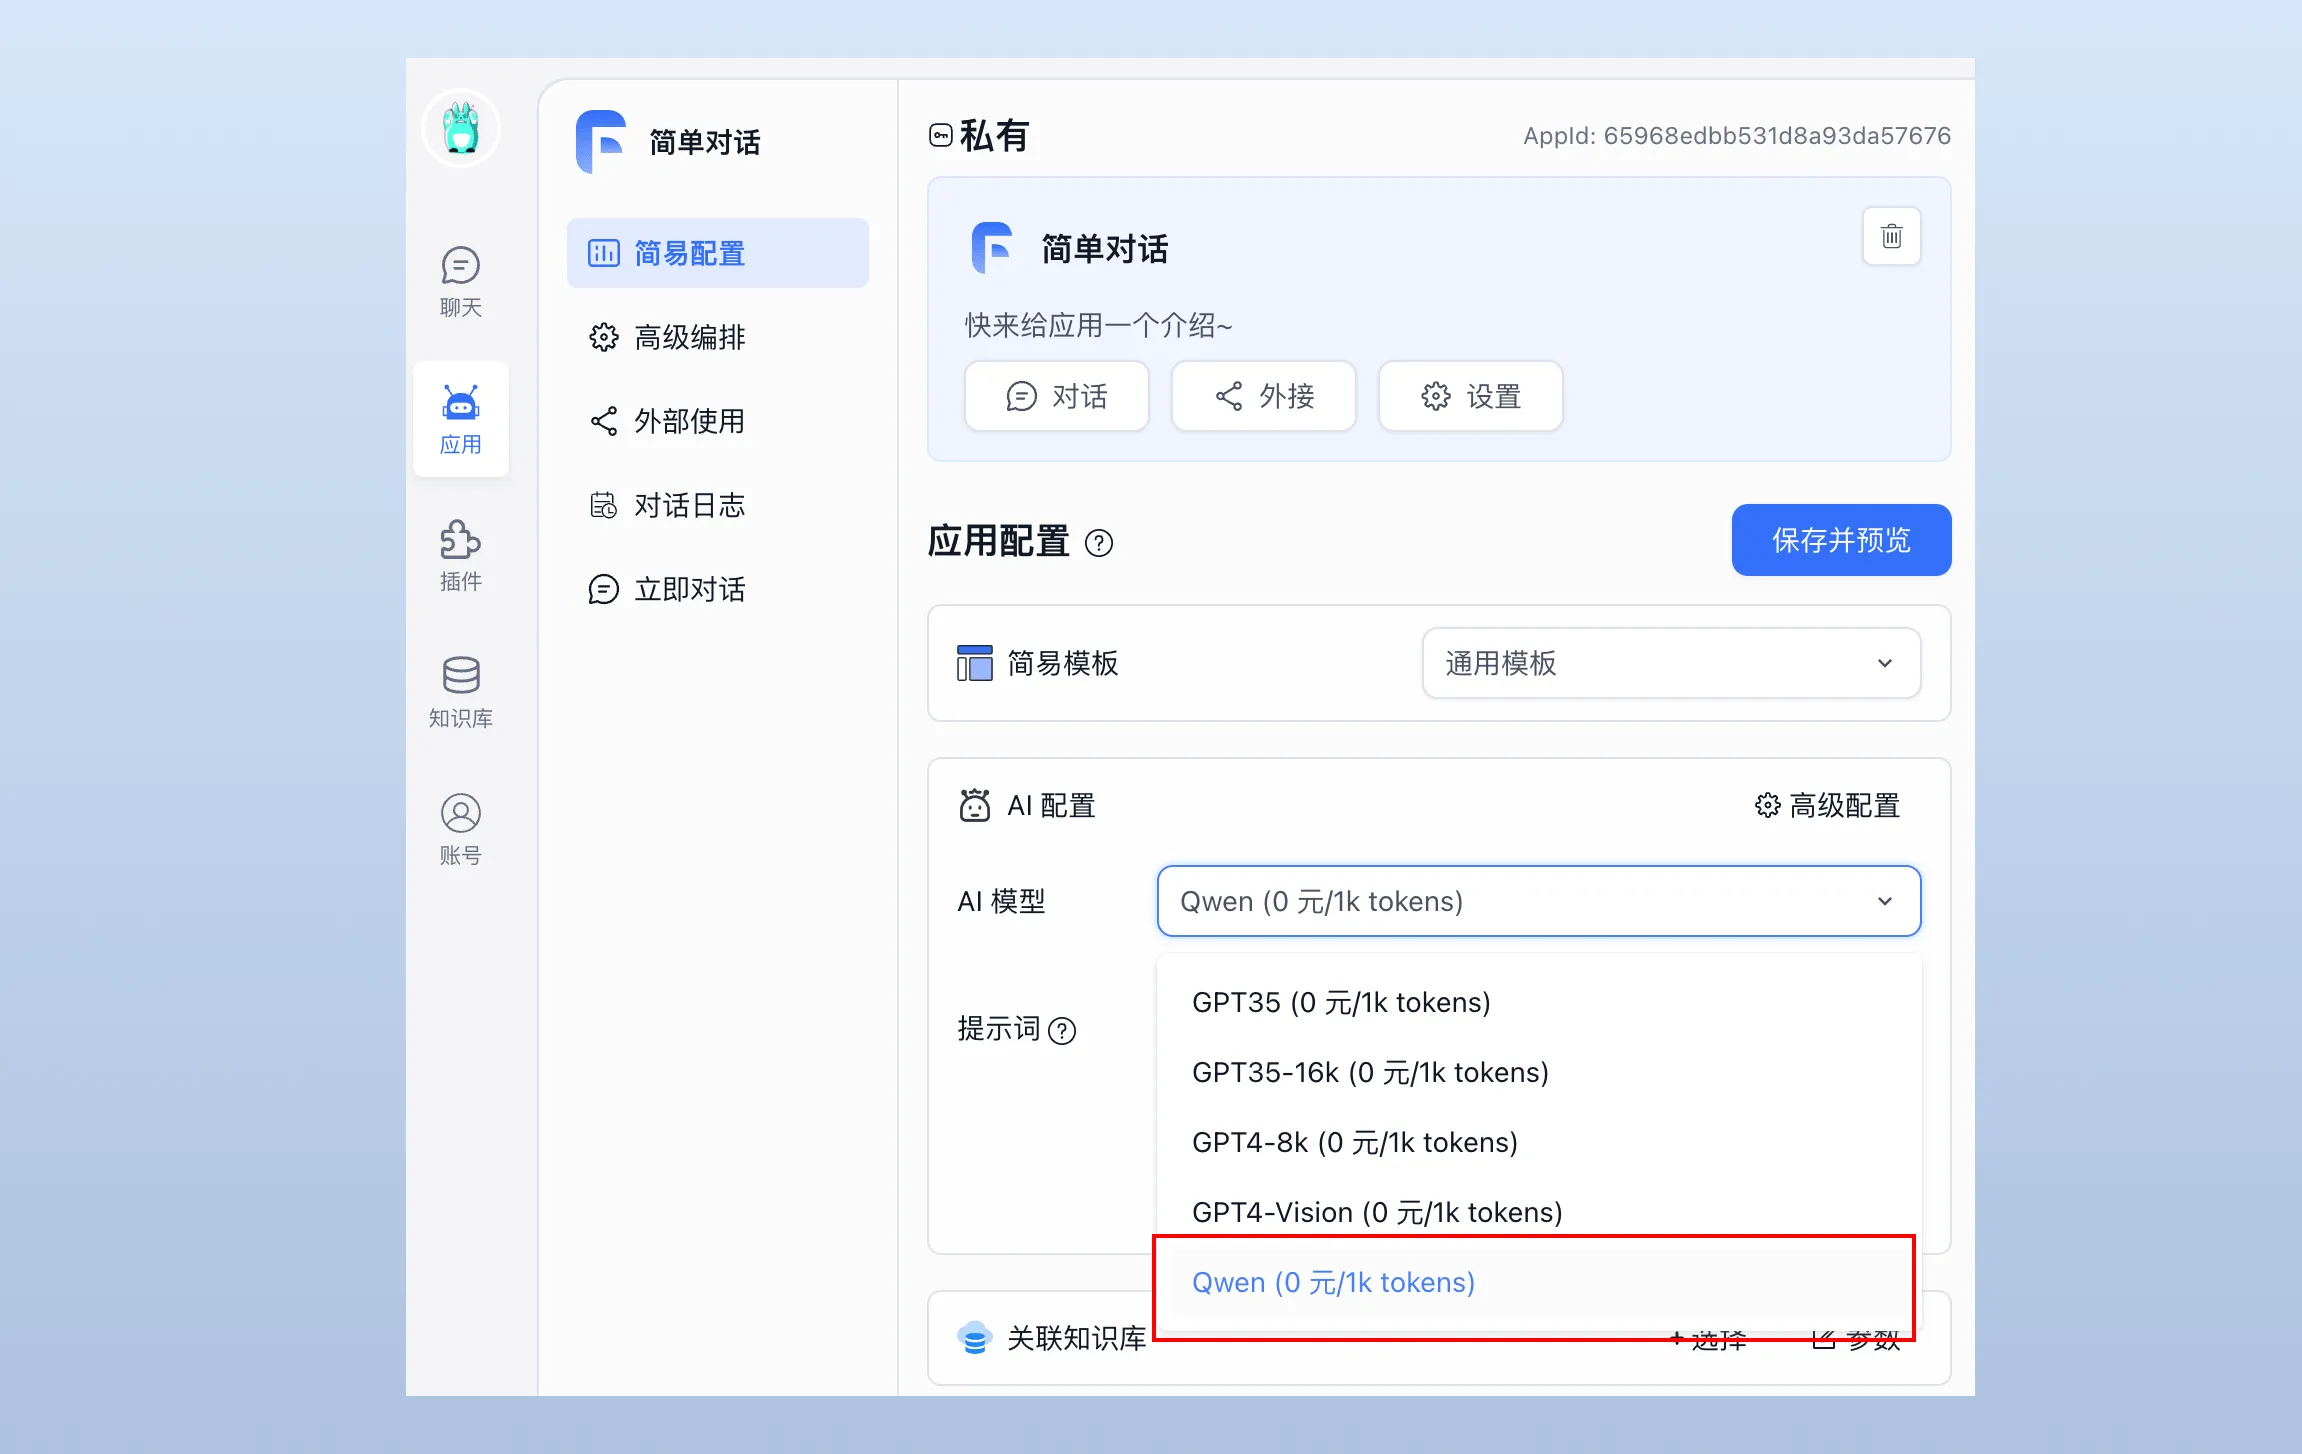
Last updated